KTM 450 EXC Adventure Conversion
a light enduro travel companion
The Fundamentals
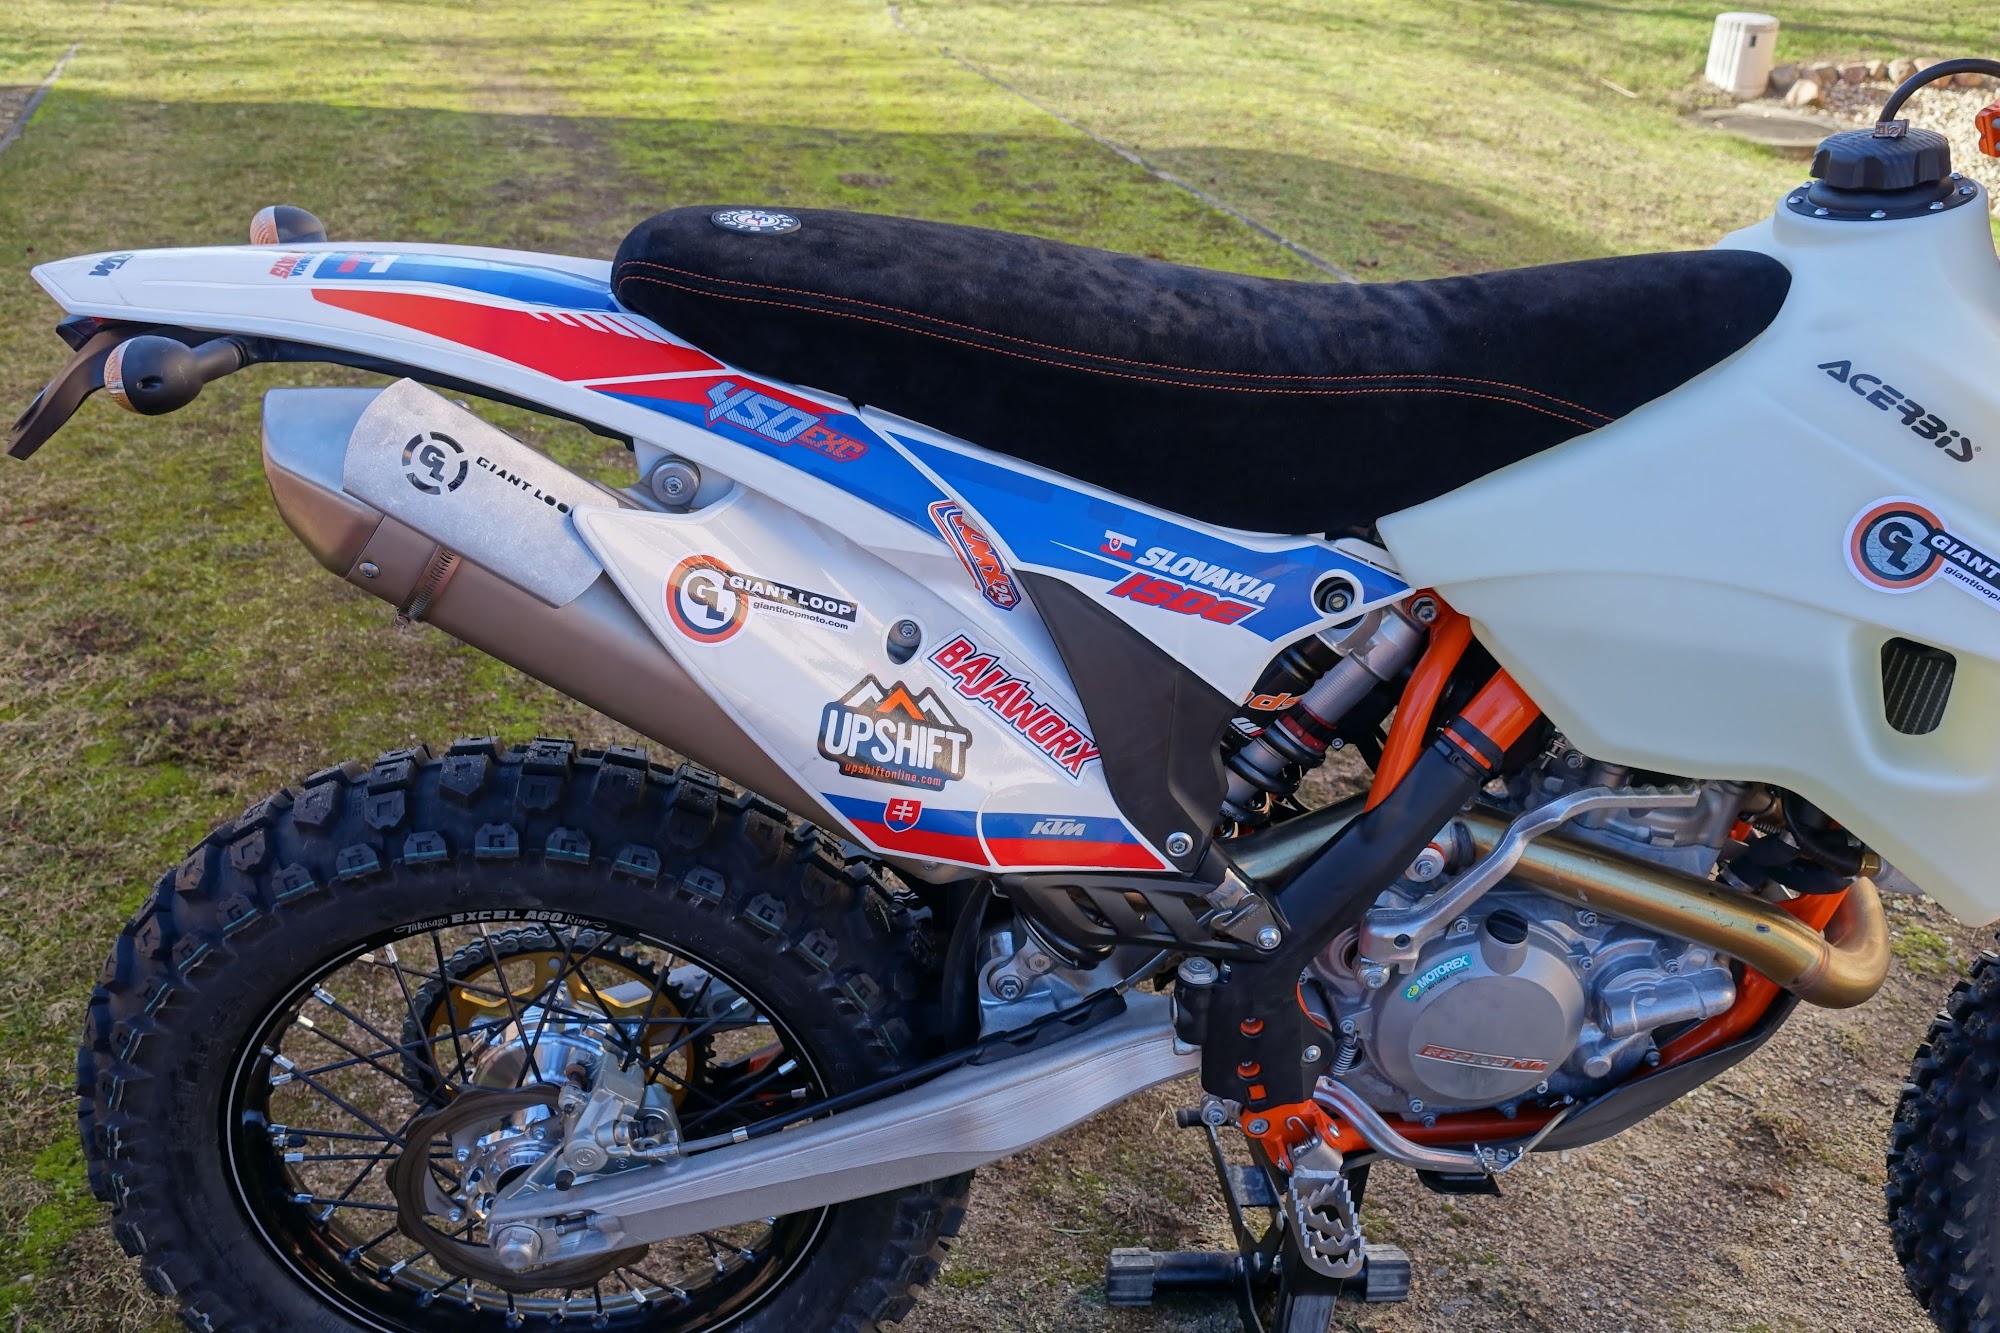
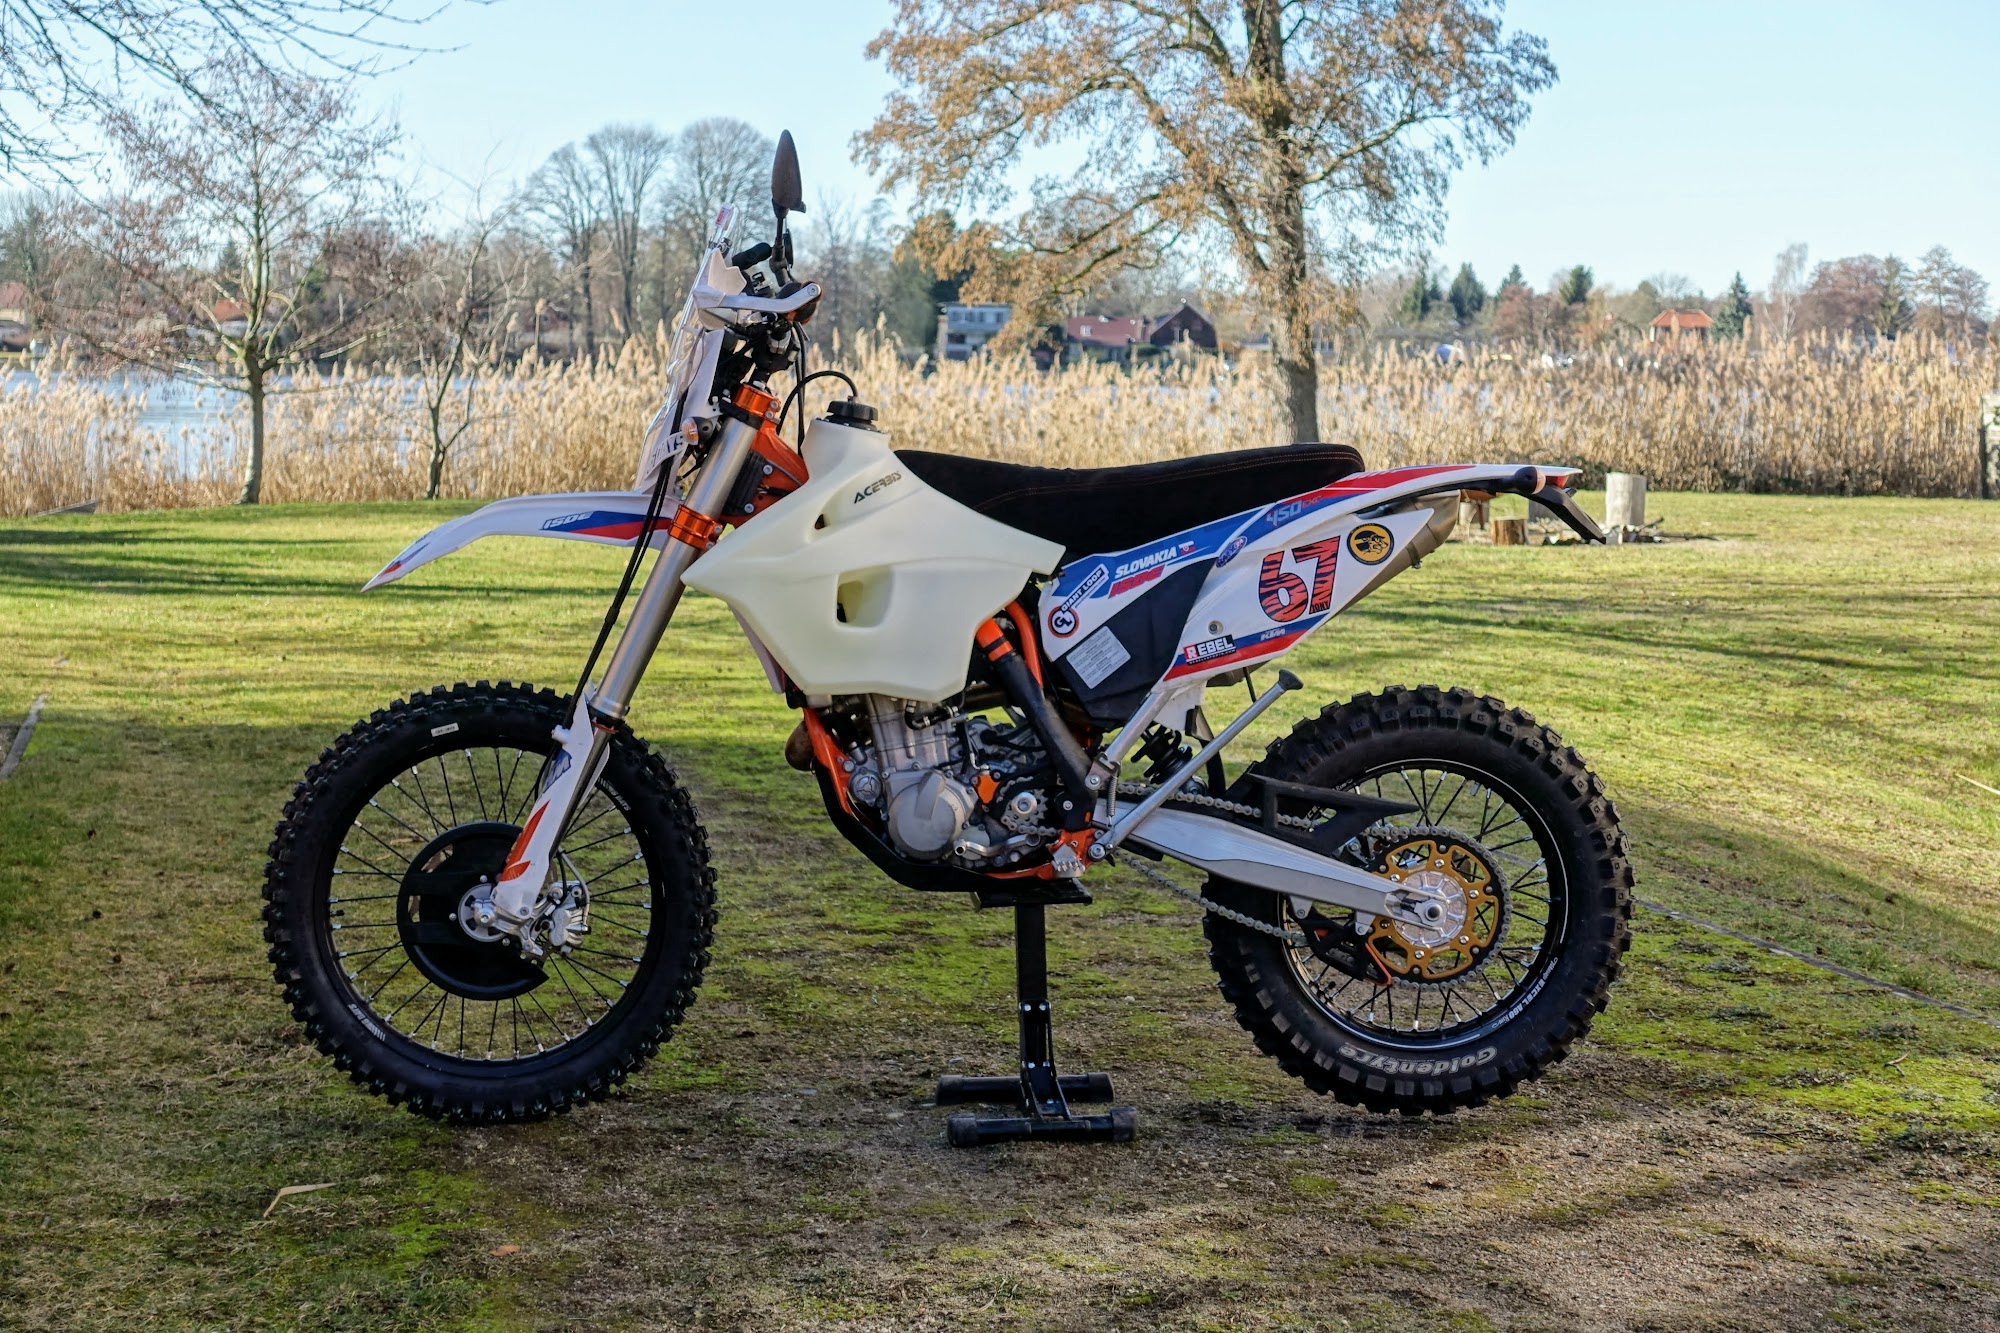
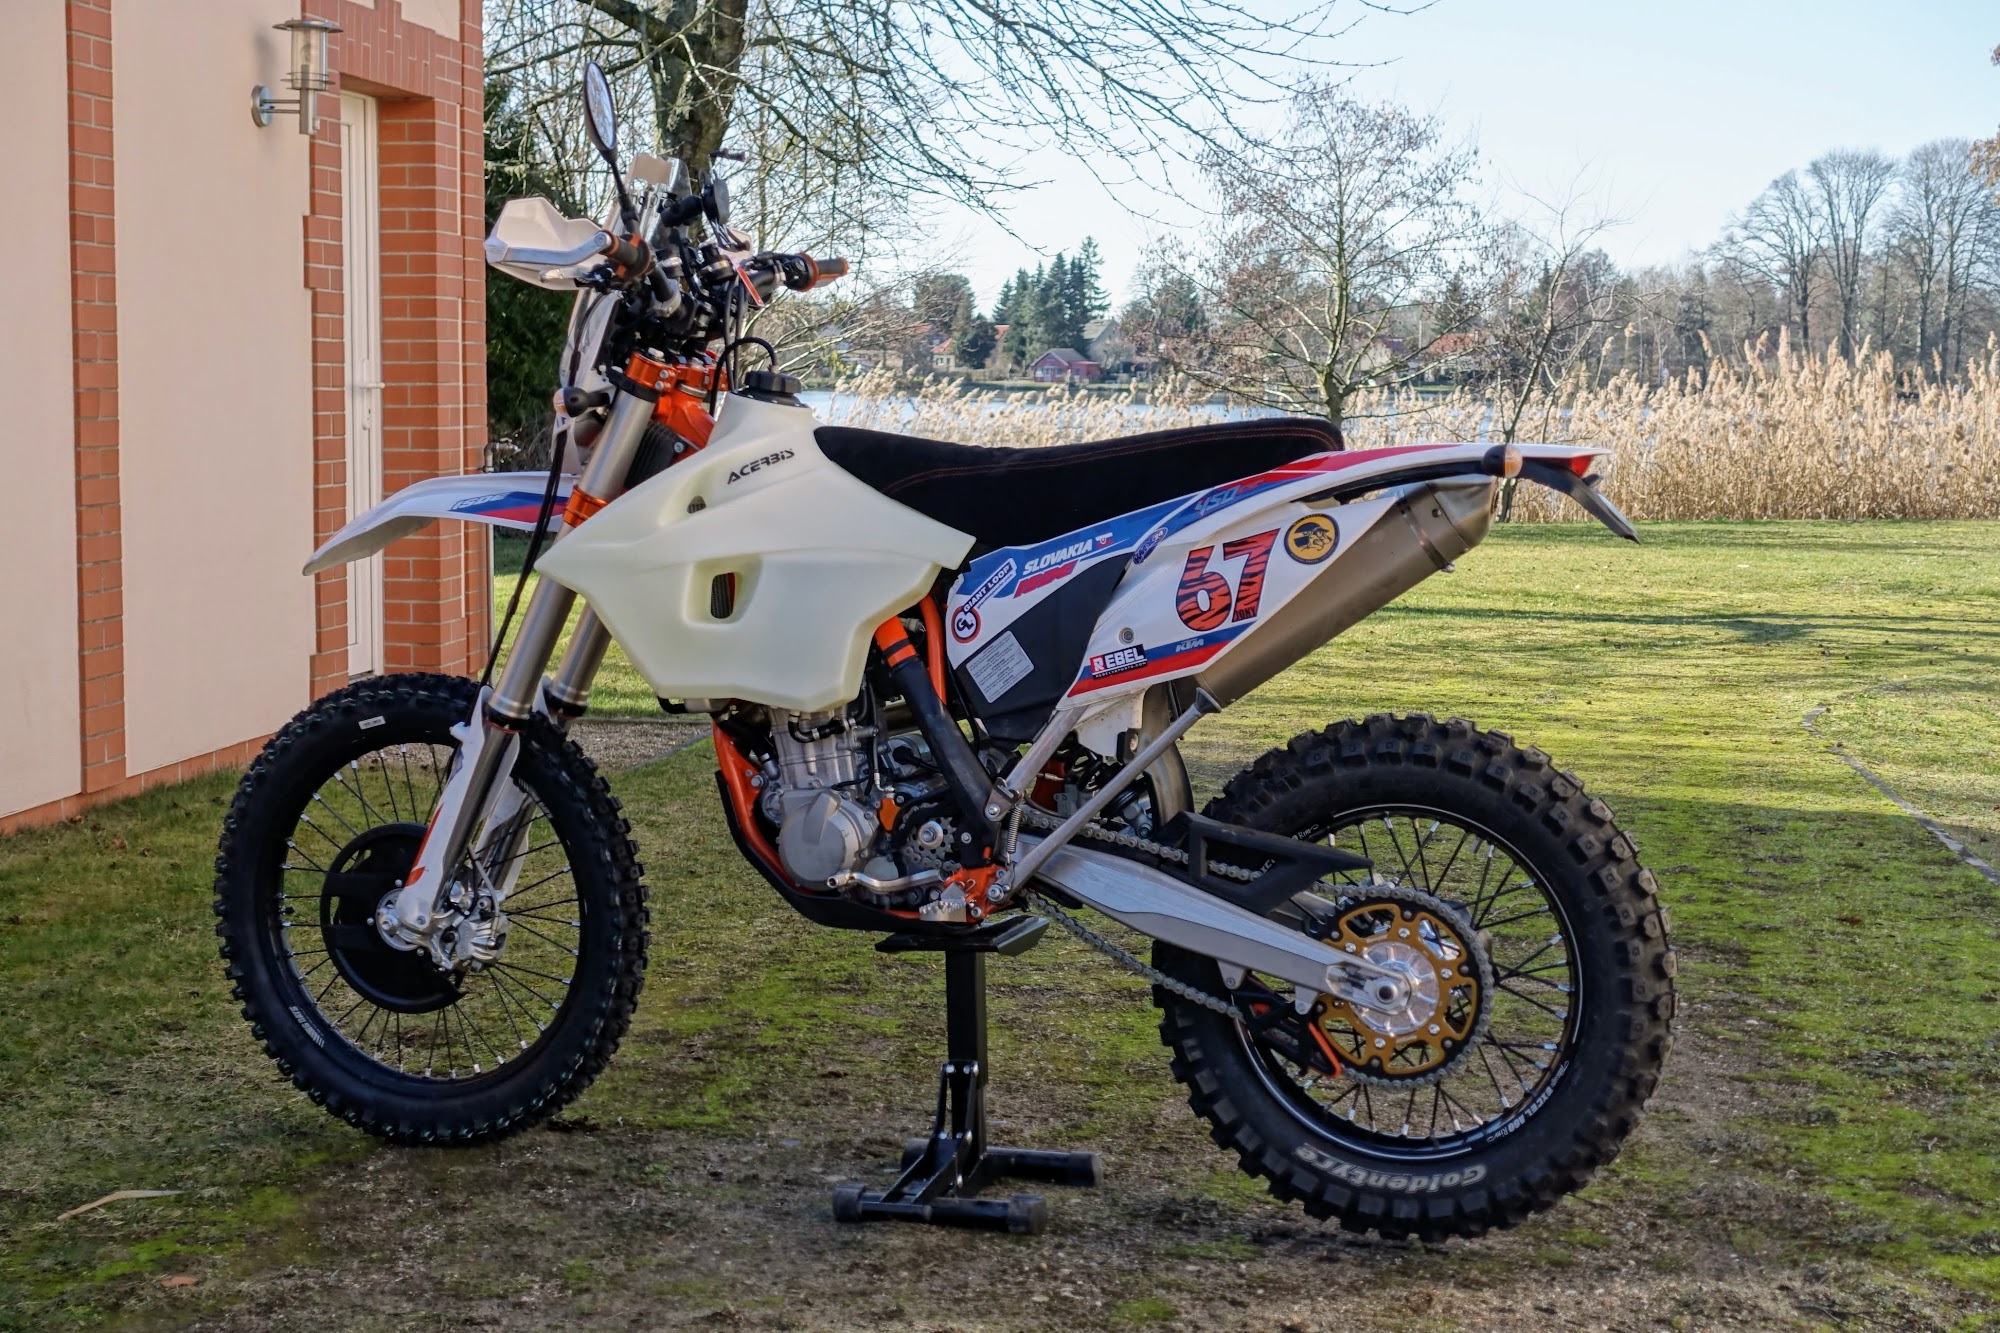
As a base I’ll use my 2016 KTM 450 EXC Six Days to build a dual sport oriented dirt bike that follows in the XR650’s footsteps, fixing all the "negative" aspects I found with this bike. The 450(2016) is a bit more snappy and aggressive compared to its 500 counterpart (2016). I do not mind that and even see this as an advantage. For a travelling base the 12-16 EXC engines are well known and proofed to be very reliable as some ride reports state serious mileage on these engines. Newer versions, unfortunately have less oil capacity, a weaker subframe, no kickstarter and more complex electronics. This made up my choice to go with a 2016 model.
The Mantra
A light bike that enables me to take the enduro expeditions to the next level and is capable of doing lots of mileage while carrying a set of "travel-the-world luggage". A minimalistic build approach, concentrating on getting the necessities right and not spending thousands of dollars in rally-style mods. Leaving the bike as light and as stock as possible, not adding more possible points of failure and keeping bike easy to work with and spare parts compatible. That basically sums up my philosophy behind this conversion.
Comfort & Ergonomics
A big part of making a dirt bike travel friendly is trying to improve comfort and adapt ergonomics as best as possible for your needs. It is a hard enduro and never will be a Goldwing but this is not the aim. I’m used to shaky and vibrating travel thumpers and when you’re looking at the things from this point of view there are some tweaks that tremendously help improving. As I’m quite tall with ~ 190cm, I knew I had to make some special changes to make long distance dual sport rides more comfortable for me. My recipe trying to make this happen is the following:
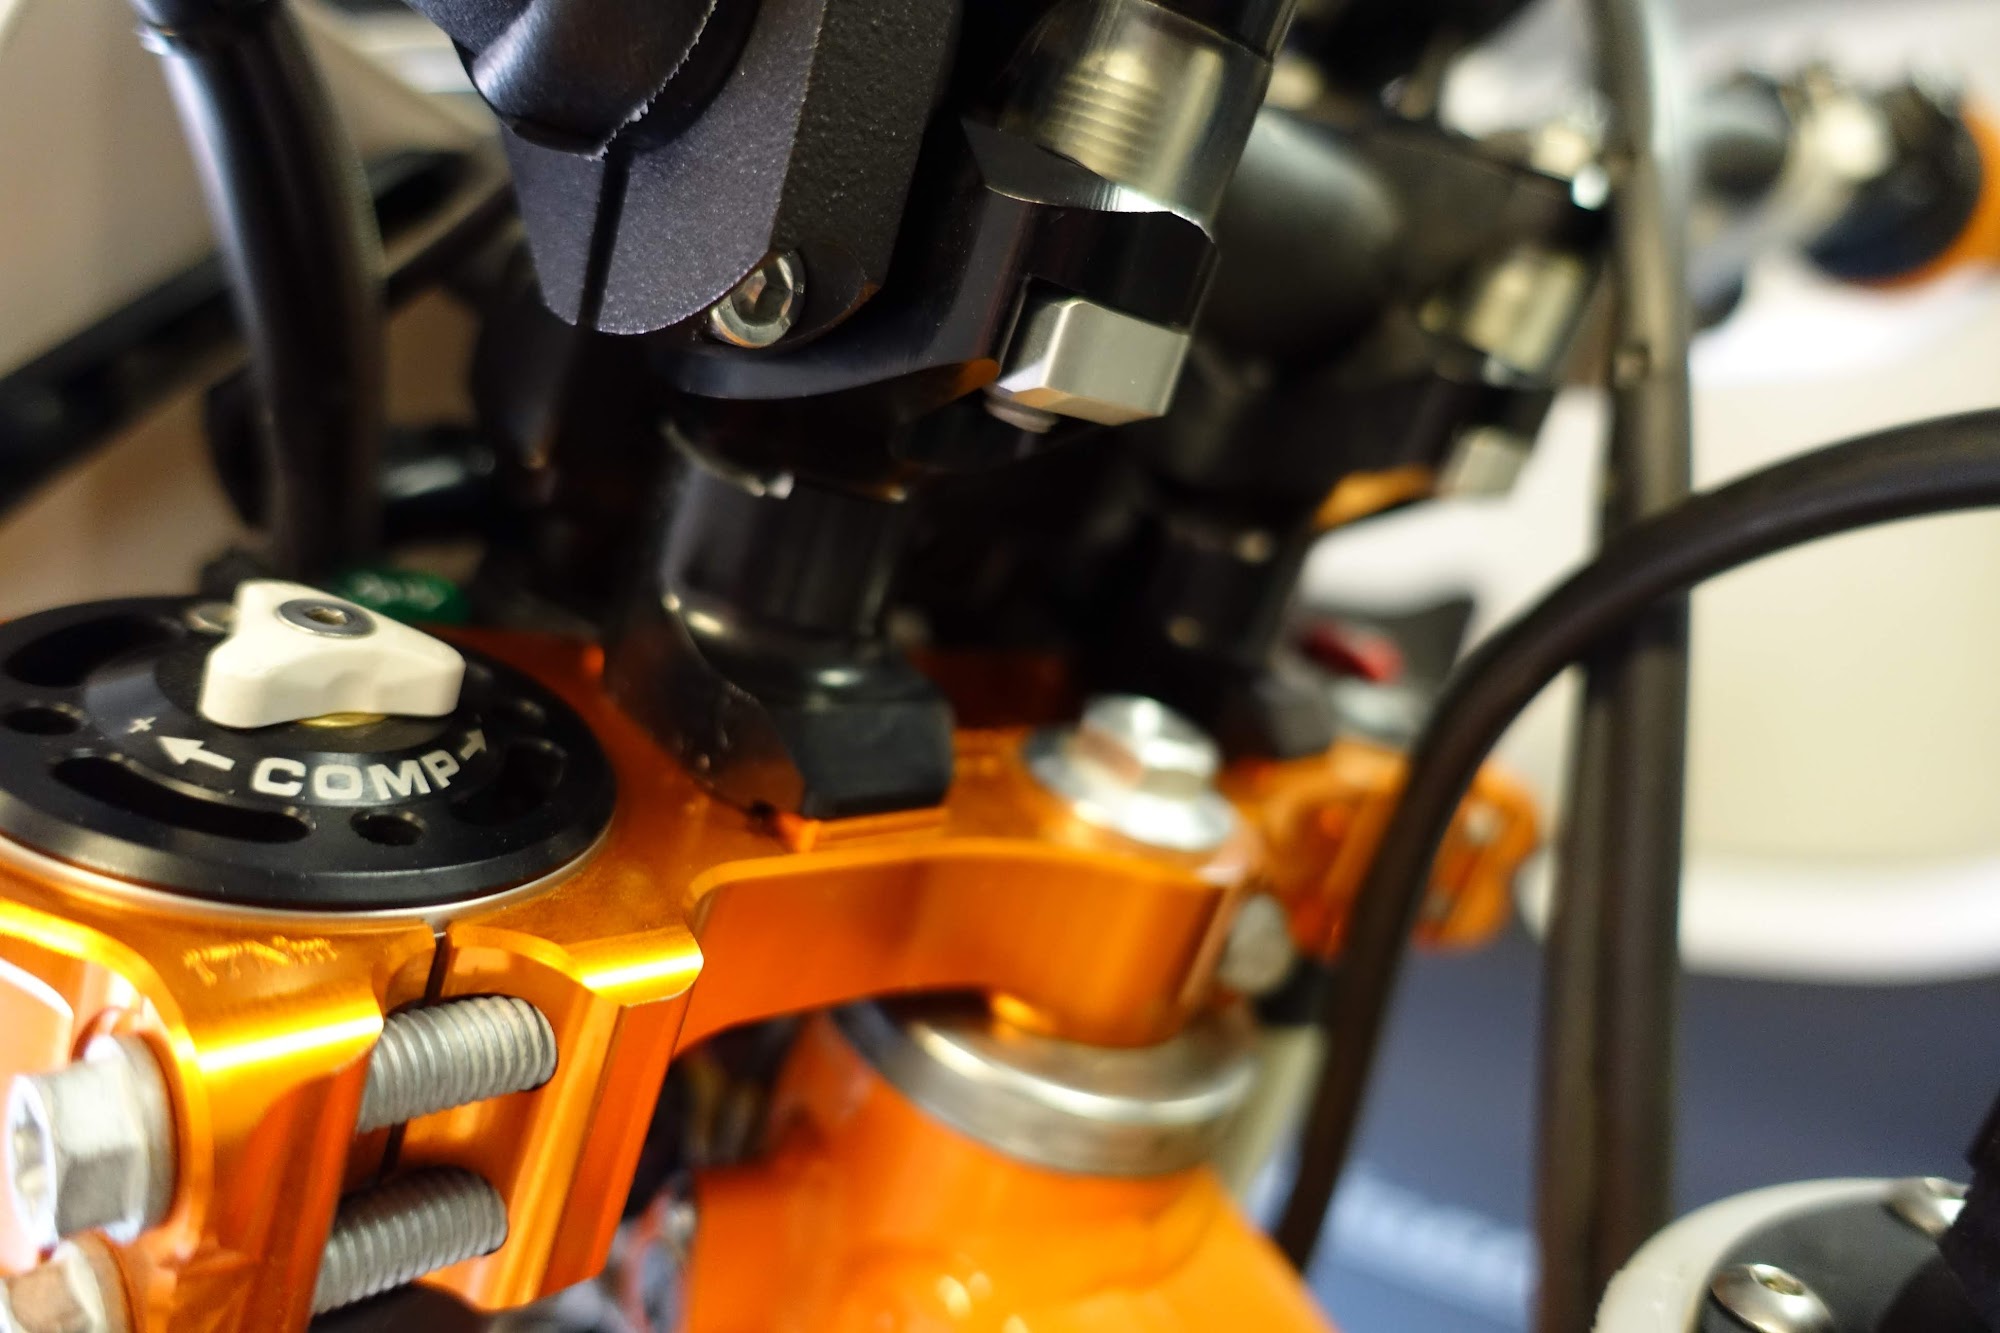
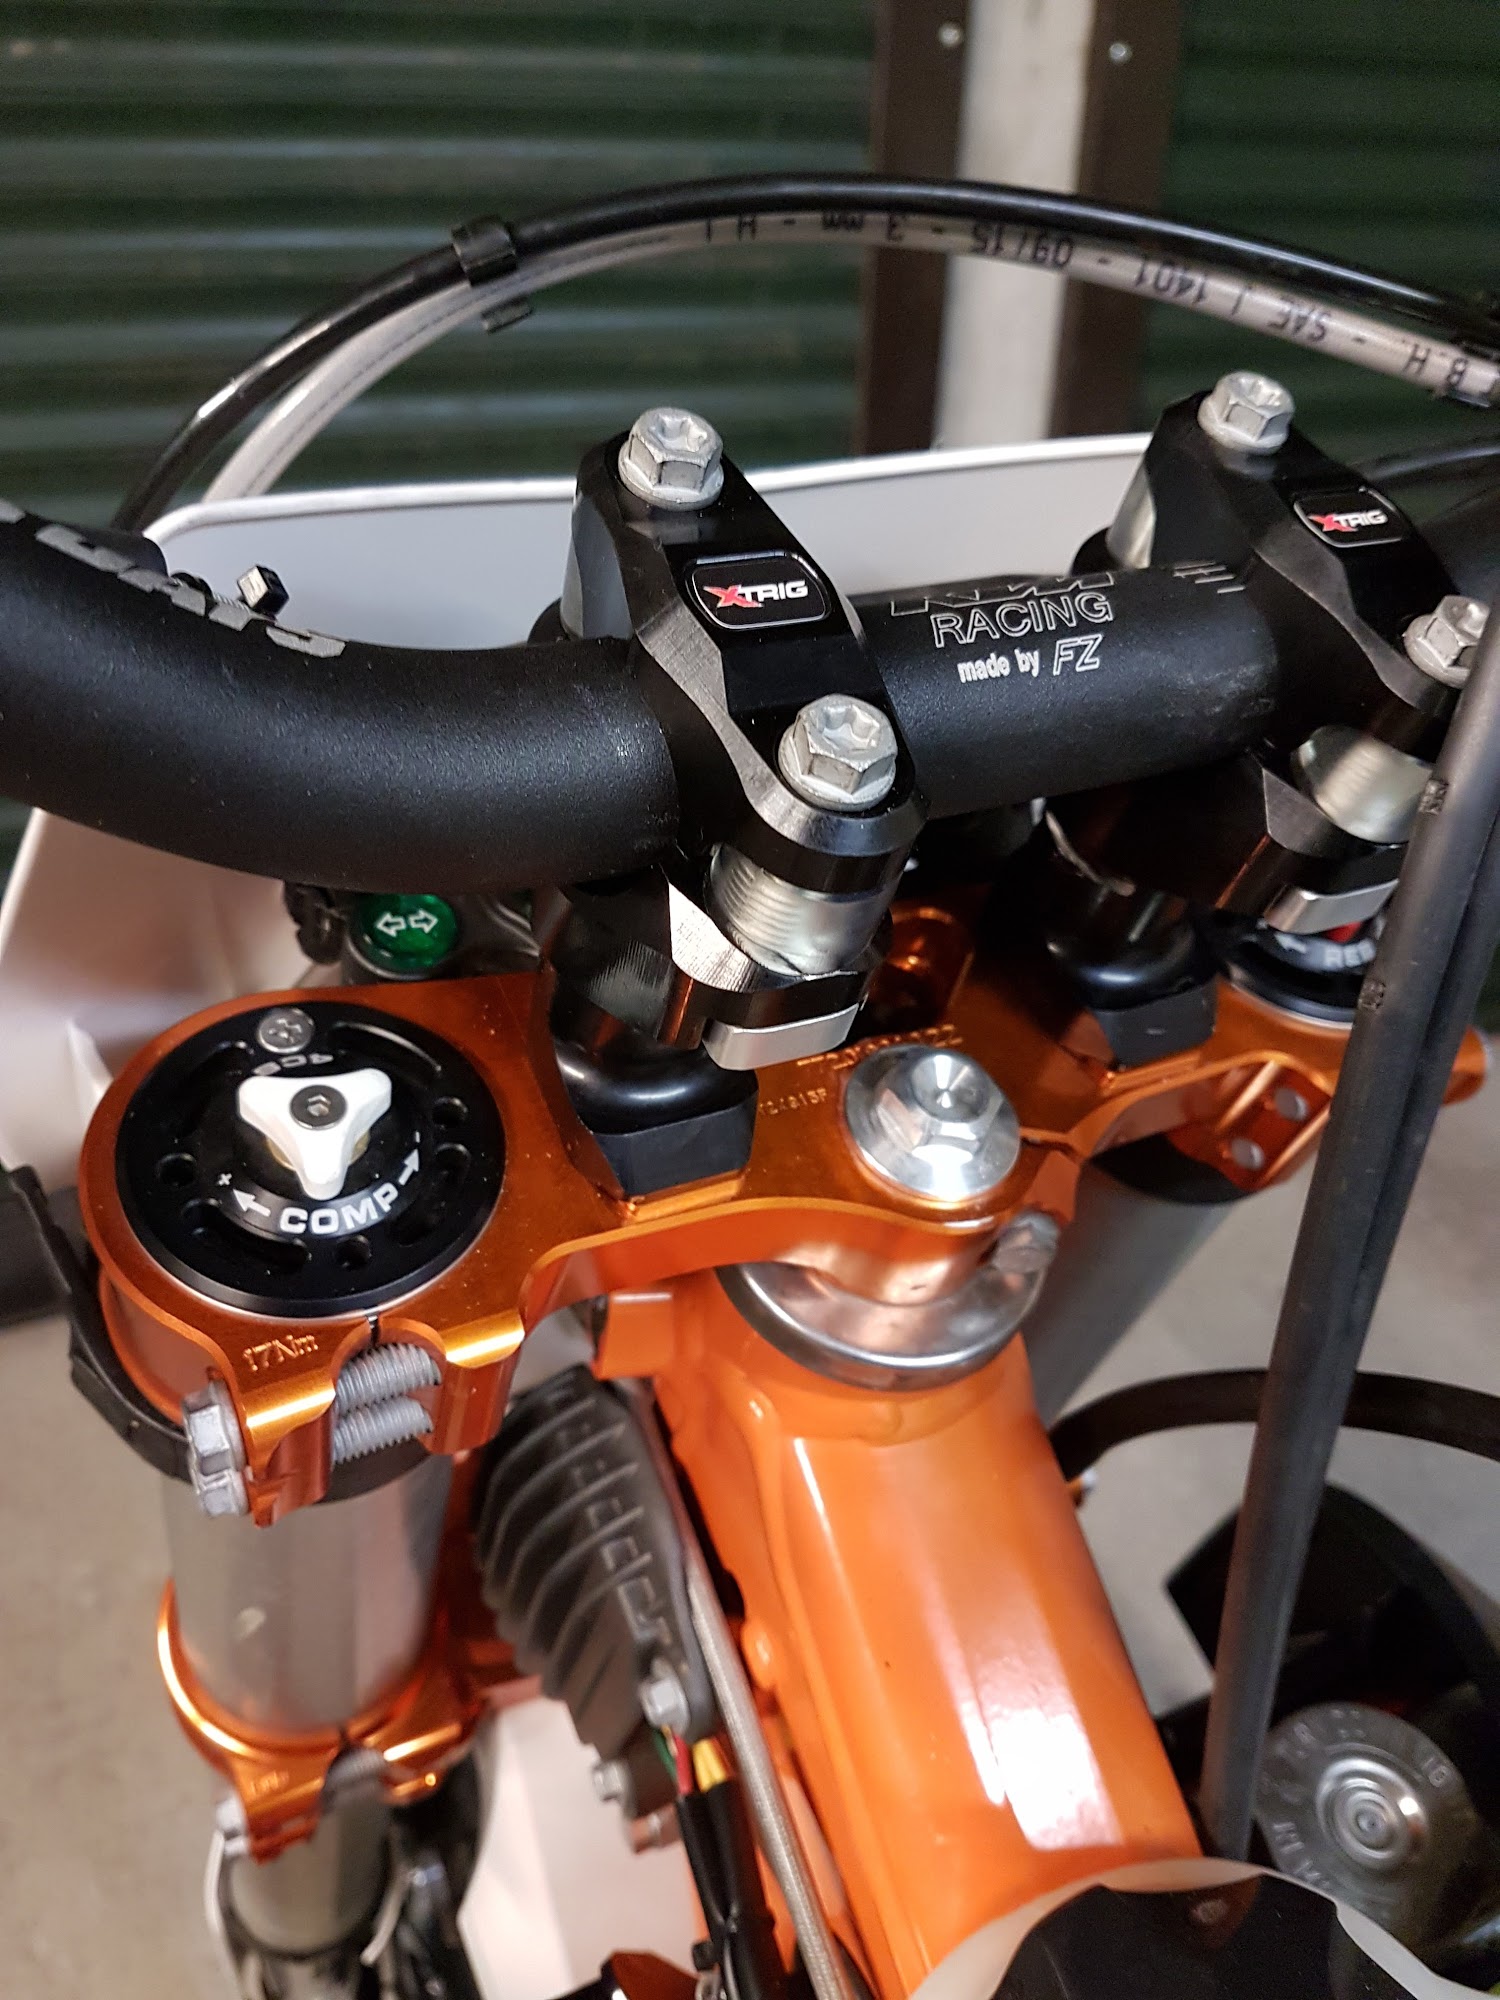
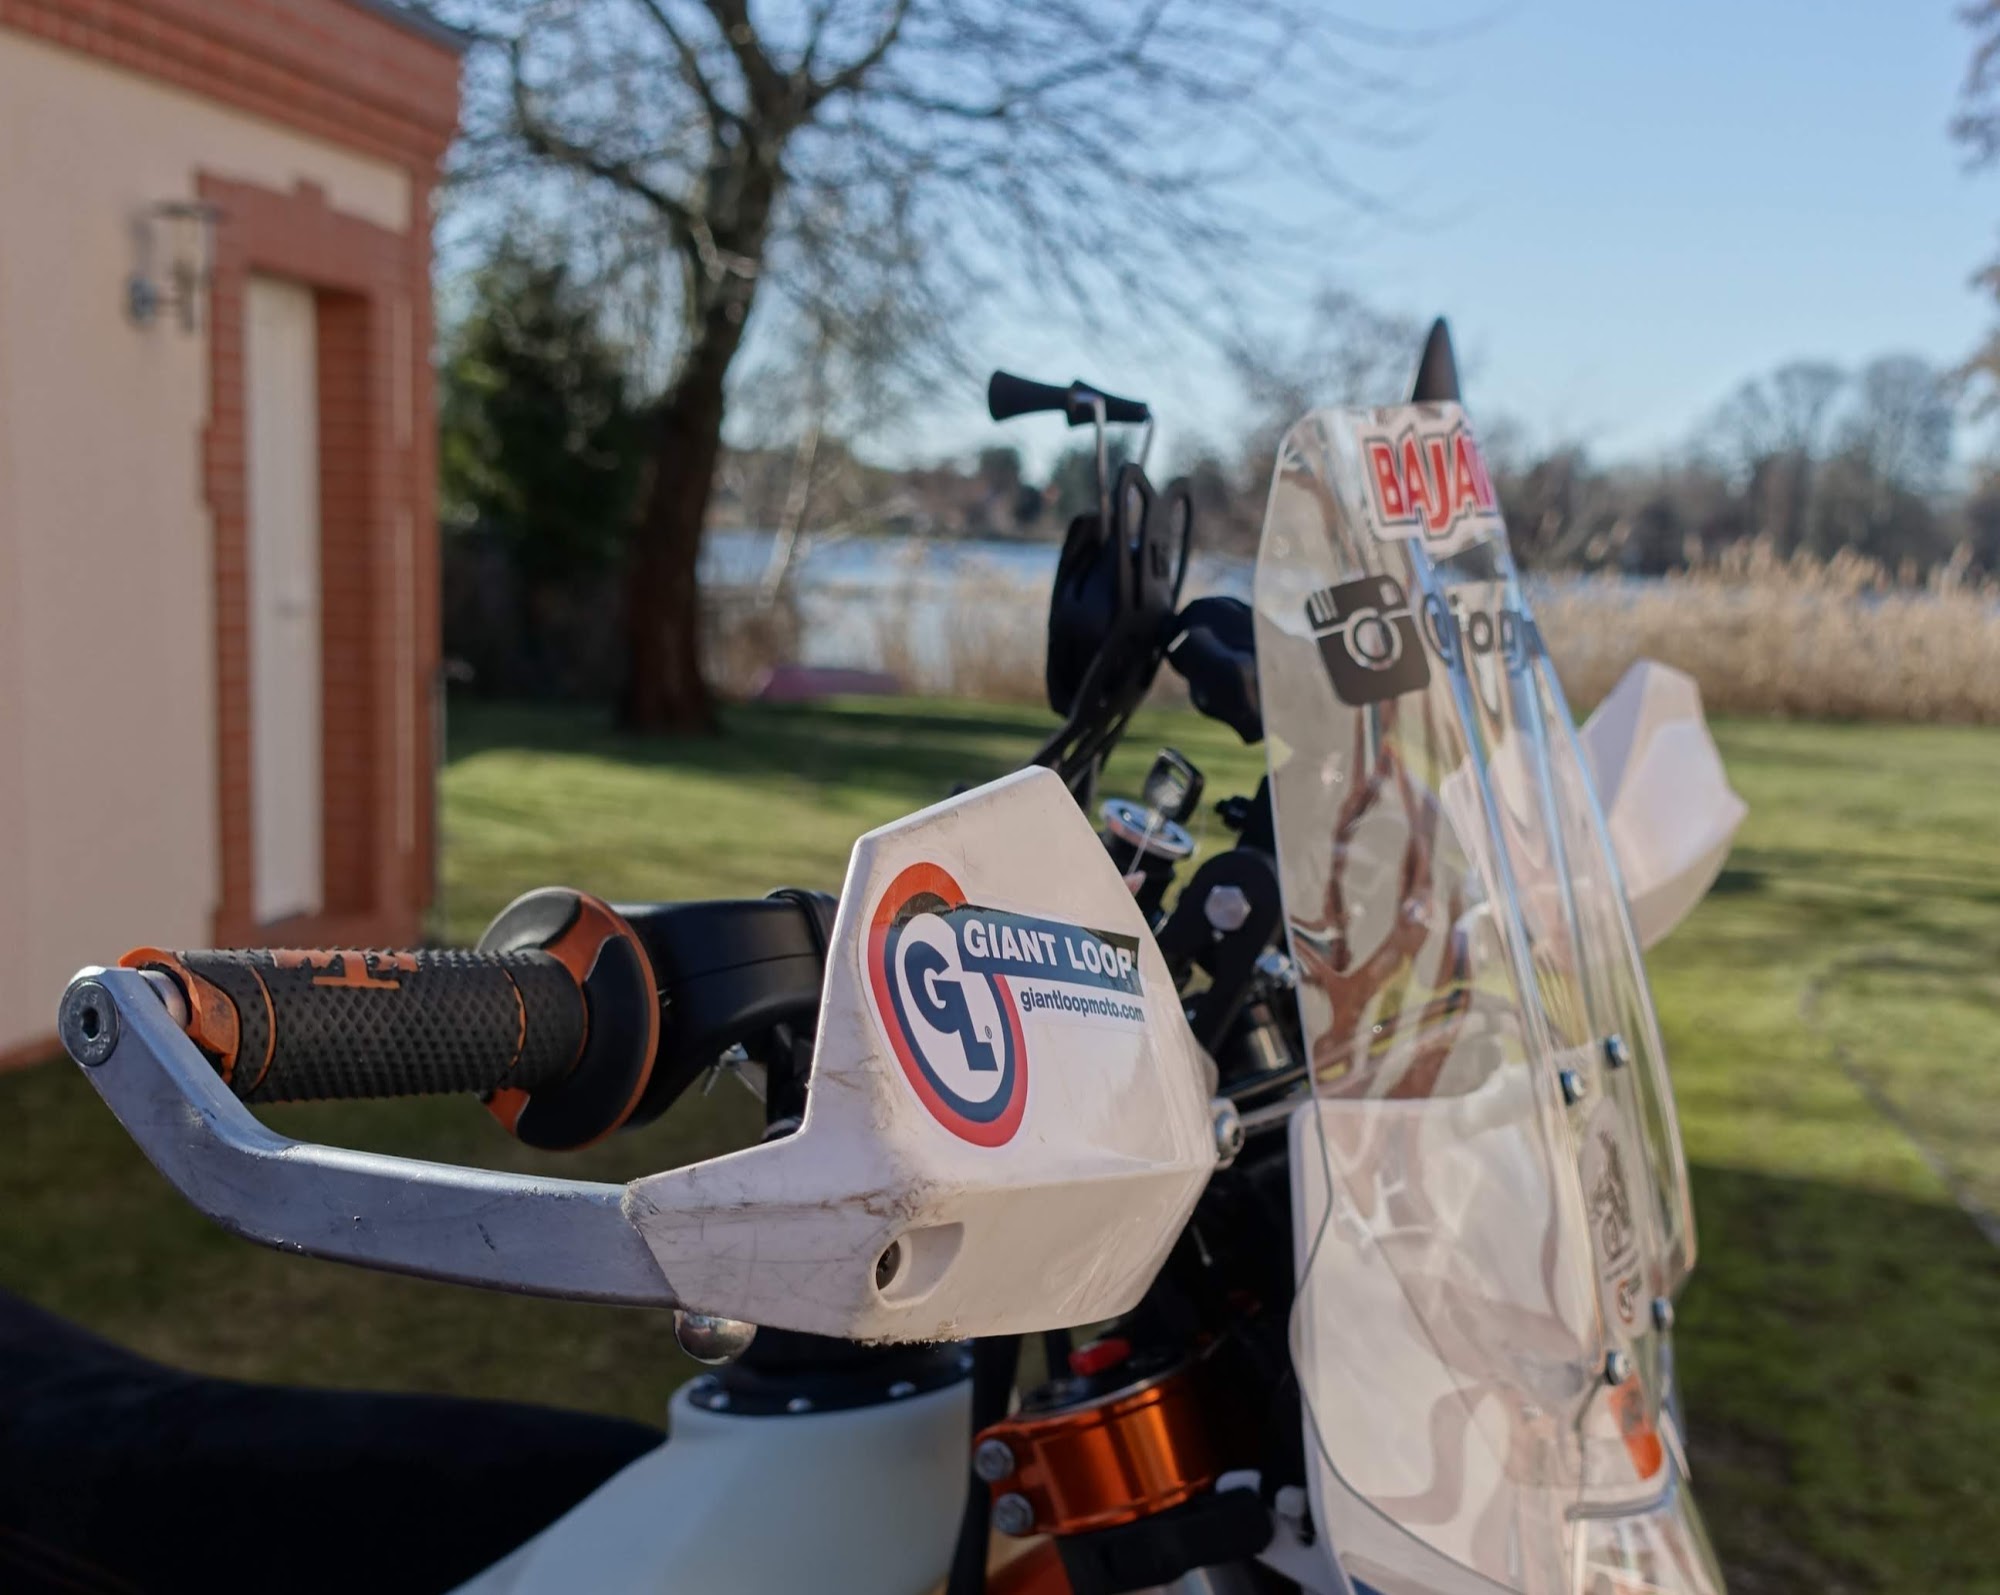
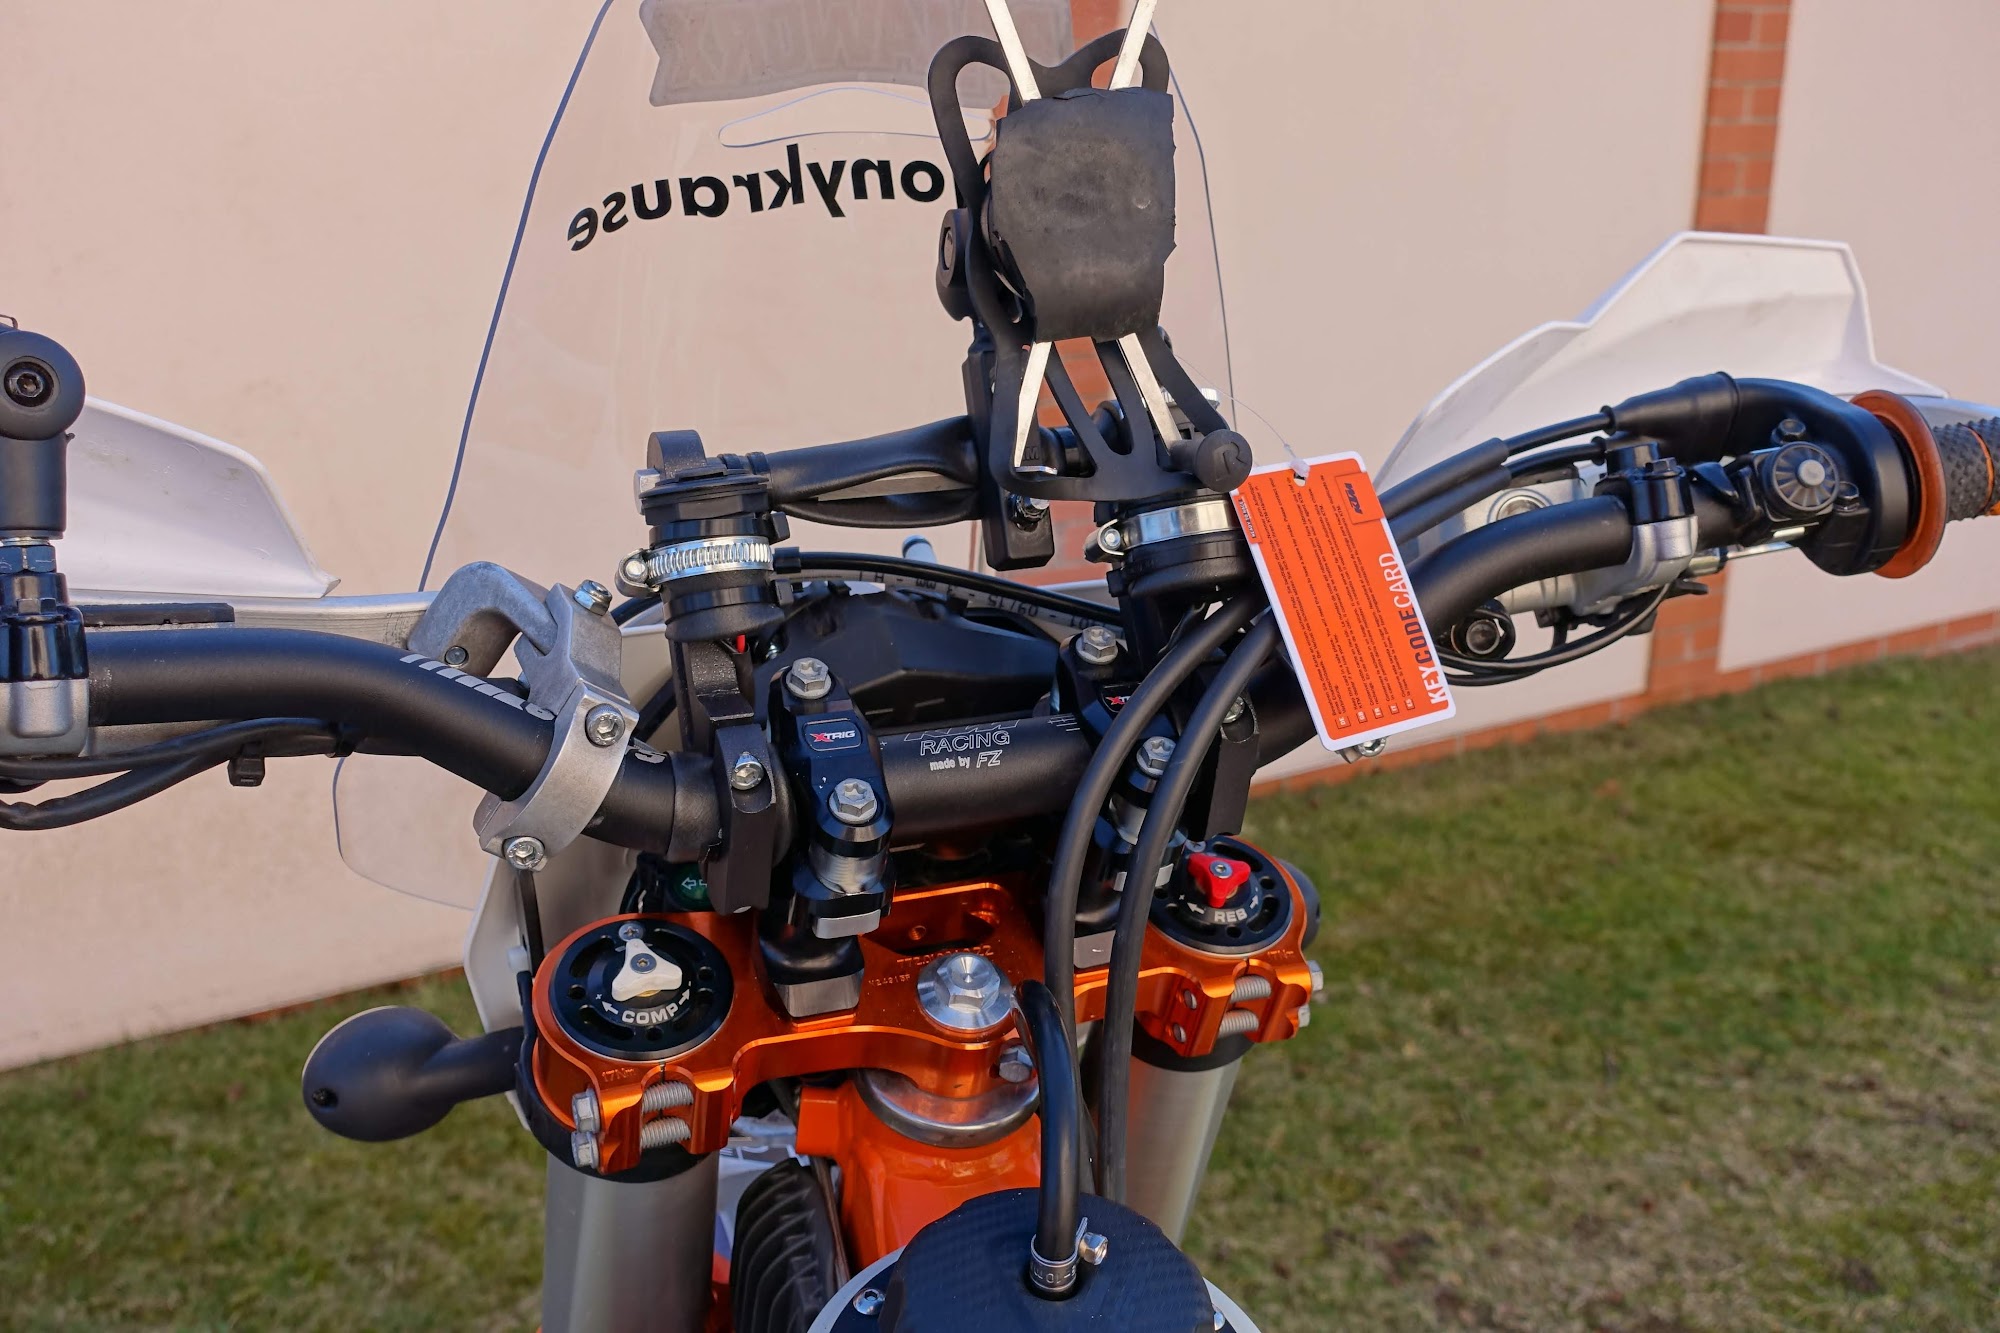
Bar Risers and PHDS damping system
First, I raised the handlebars around 4cm and at the same time installed a Xtrig PHDS damping system. This system absorbs vibrations from engine and chassis and I actually was impressed how well this works.
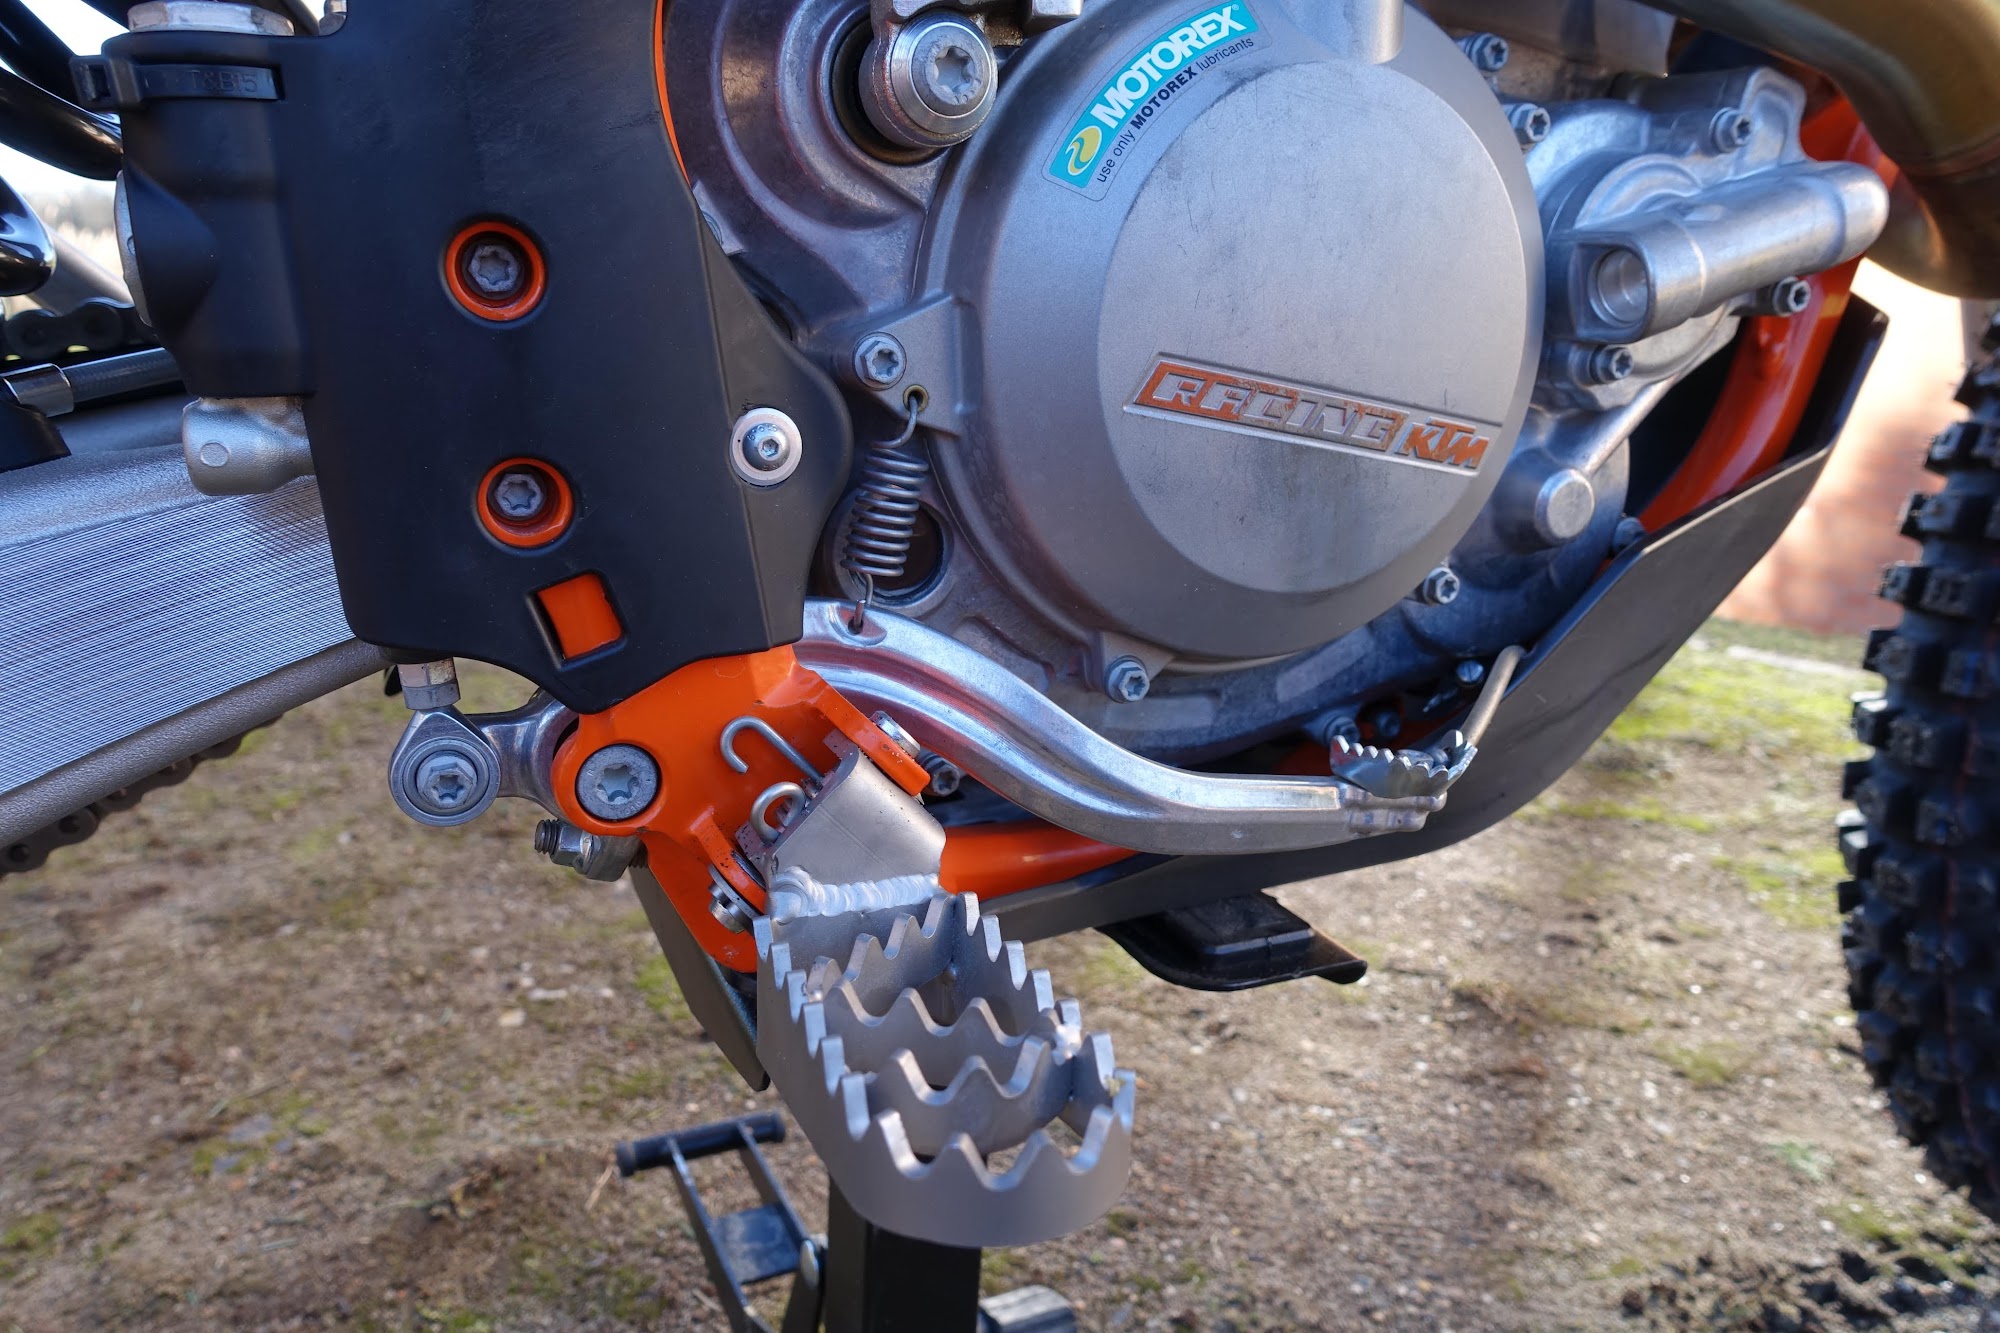
Foot Pegs
I then went to the foot pegs and installed lower replacements, around 3cm. Motobau, a local Berlin manufacturer helped with that. This massively assists in increasing knee angle and lowering center of gravity when riding standing up.
Seat
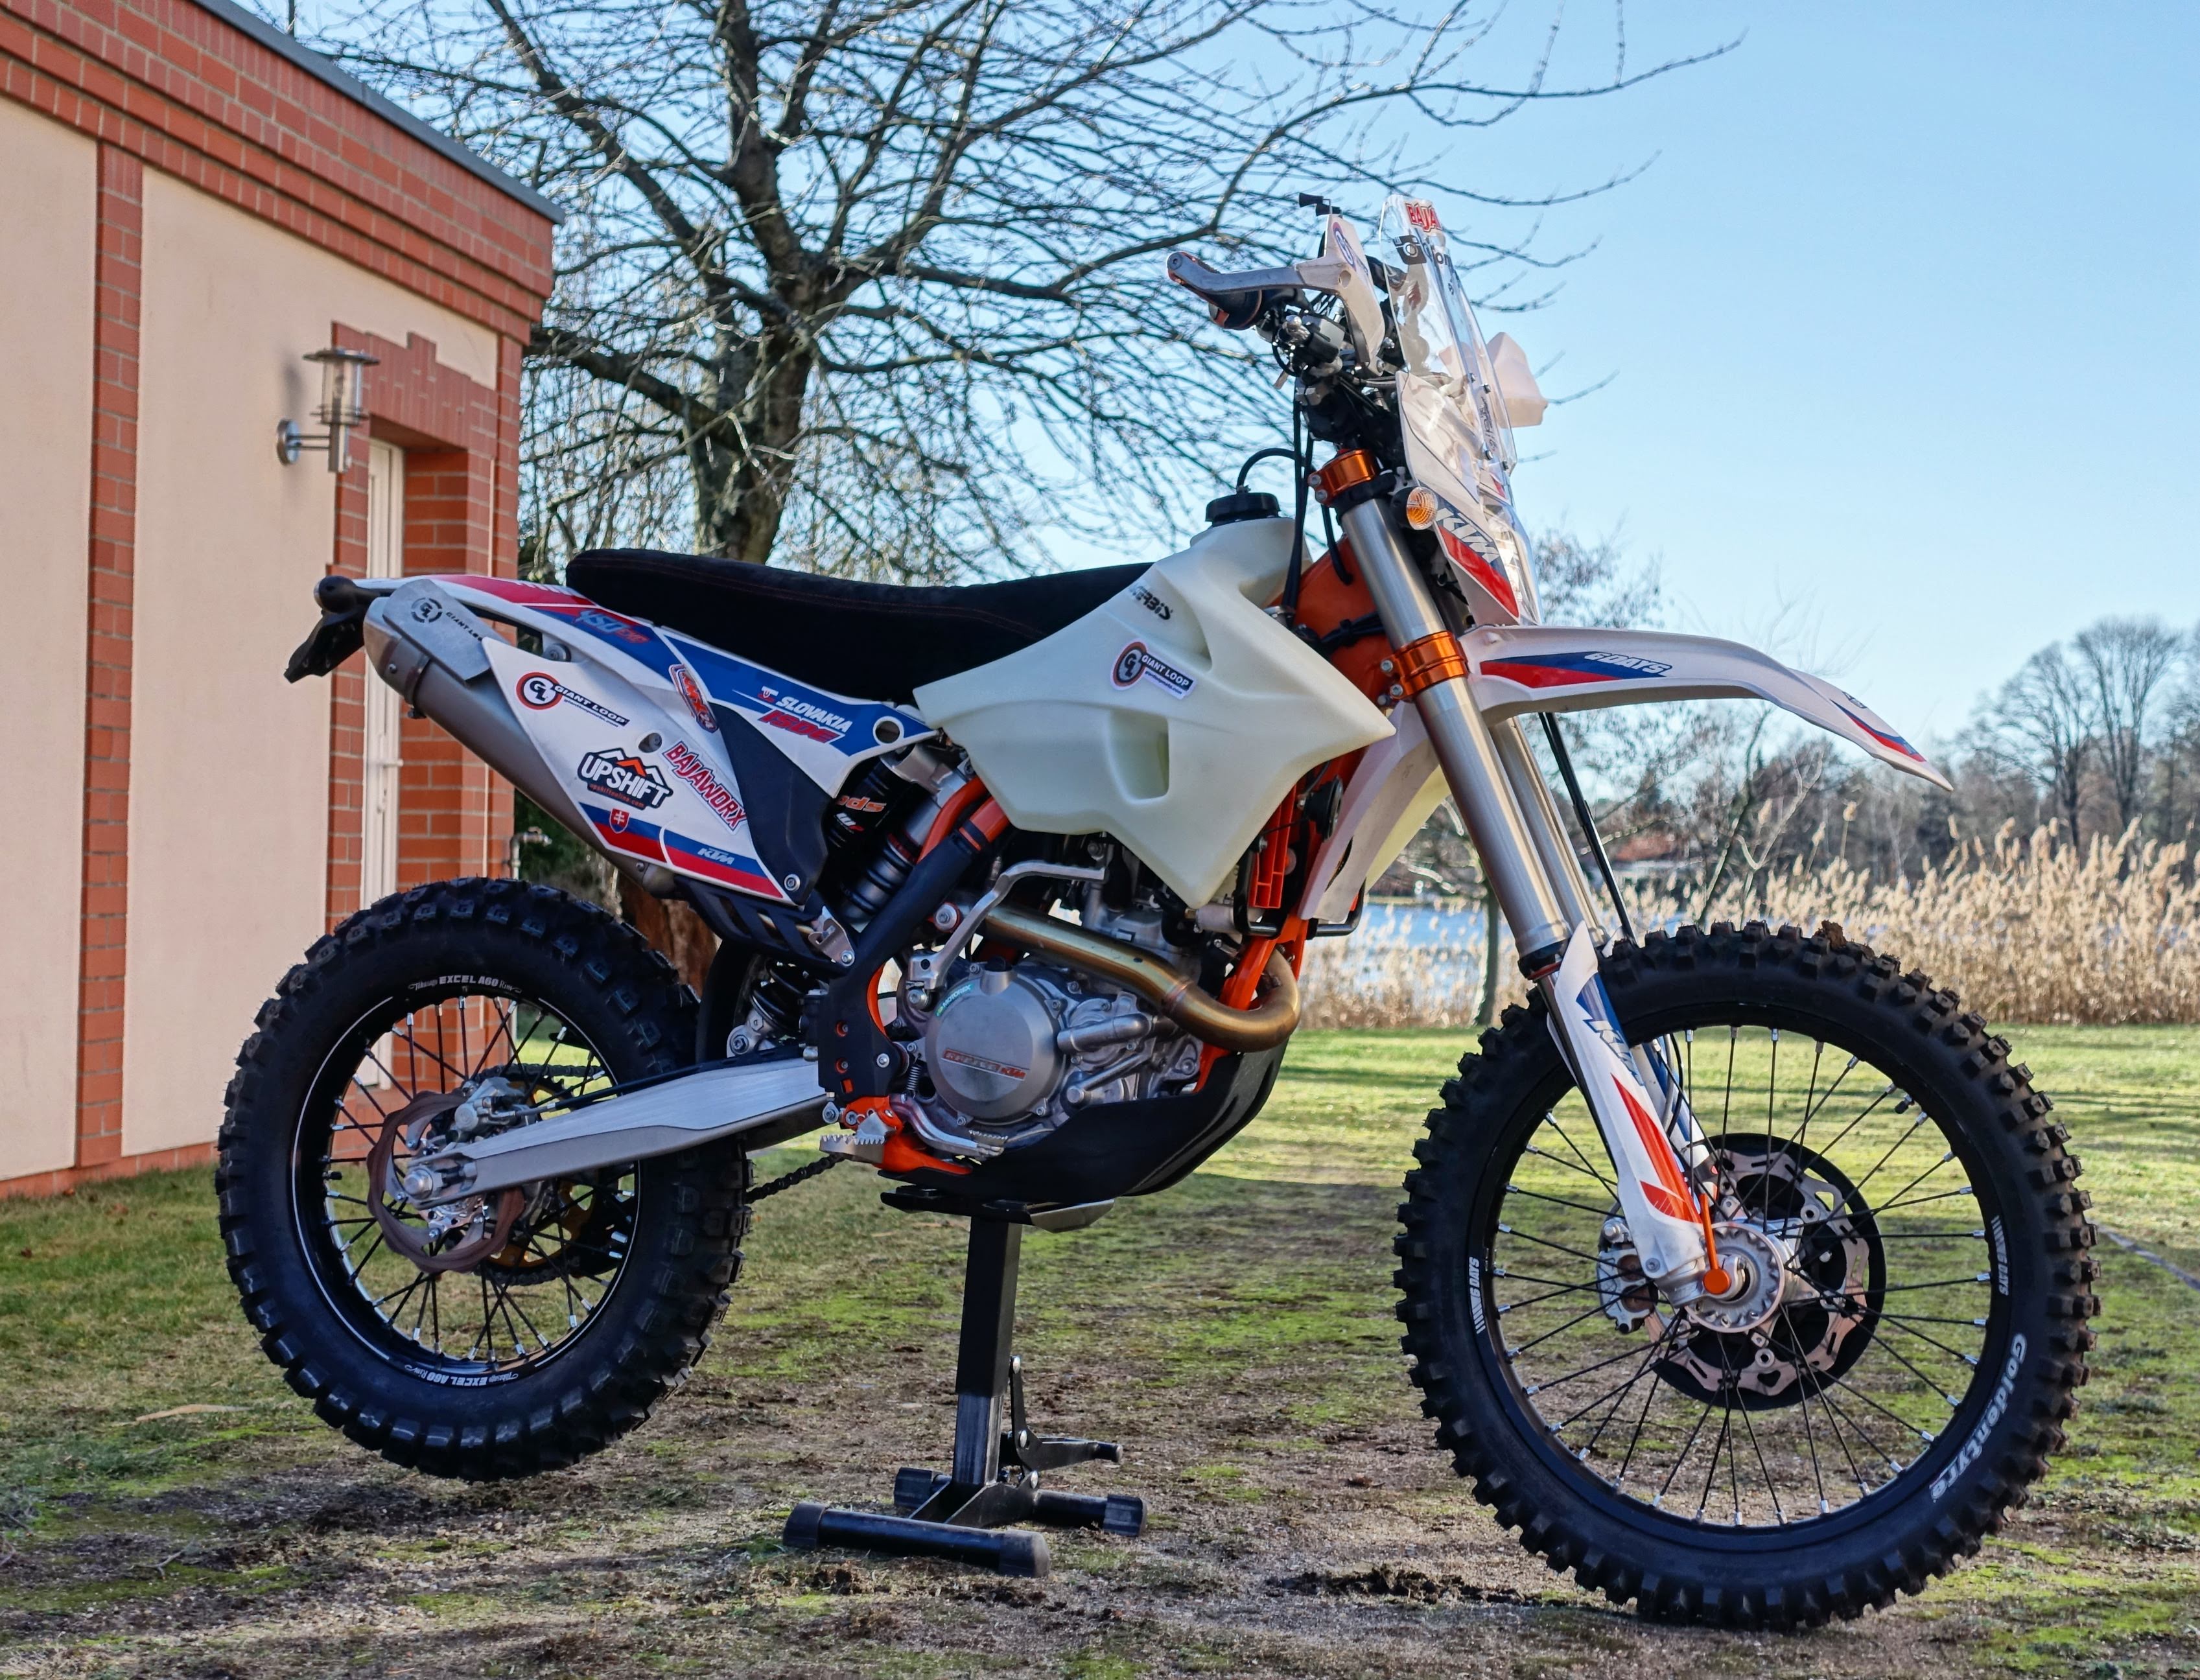
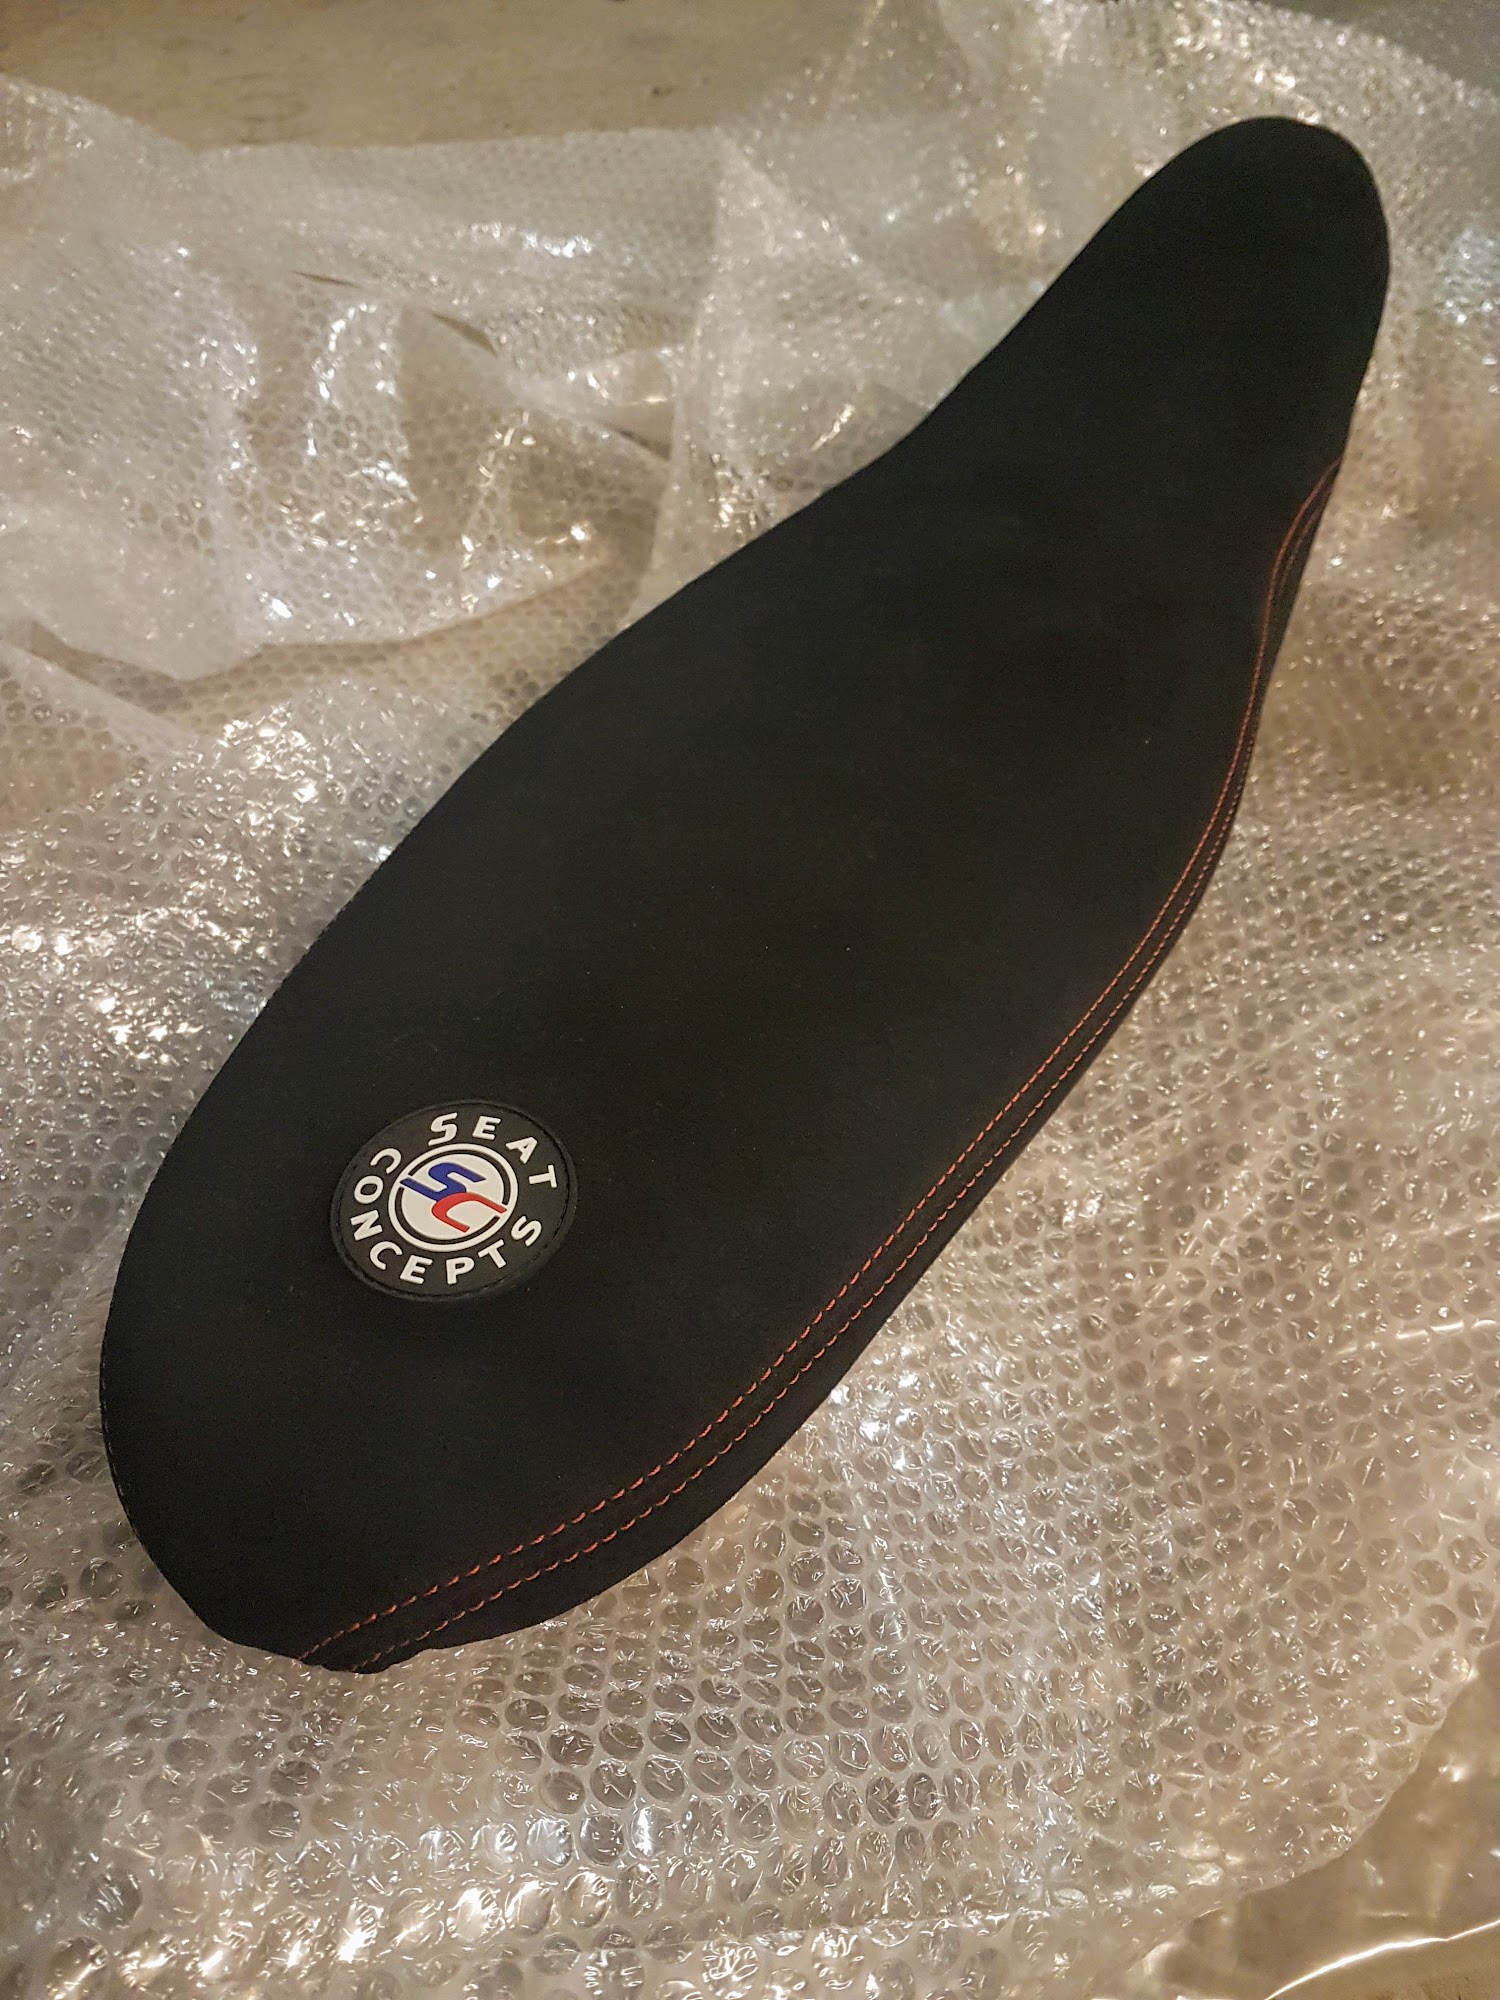
Important part of ergonomics and riding comfort on these kind of machines, is the seat. I evaluated several options and went with a Seatconcepts seat. I chose the Extra Tall Comfort seat Suede version. The seat lifts up my as approx. 4cm. Together with the lower foot pegs this gives me around 7cm more distance, seat height – foot pegs, which is immense practically.
Suspension
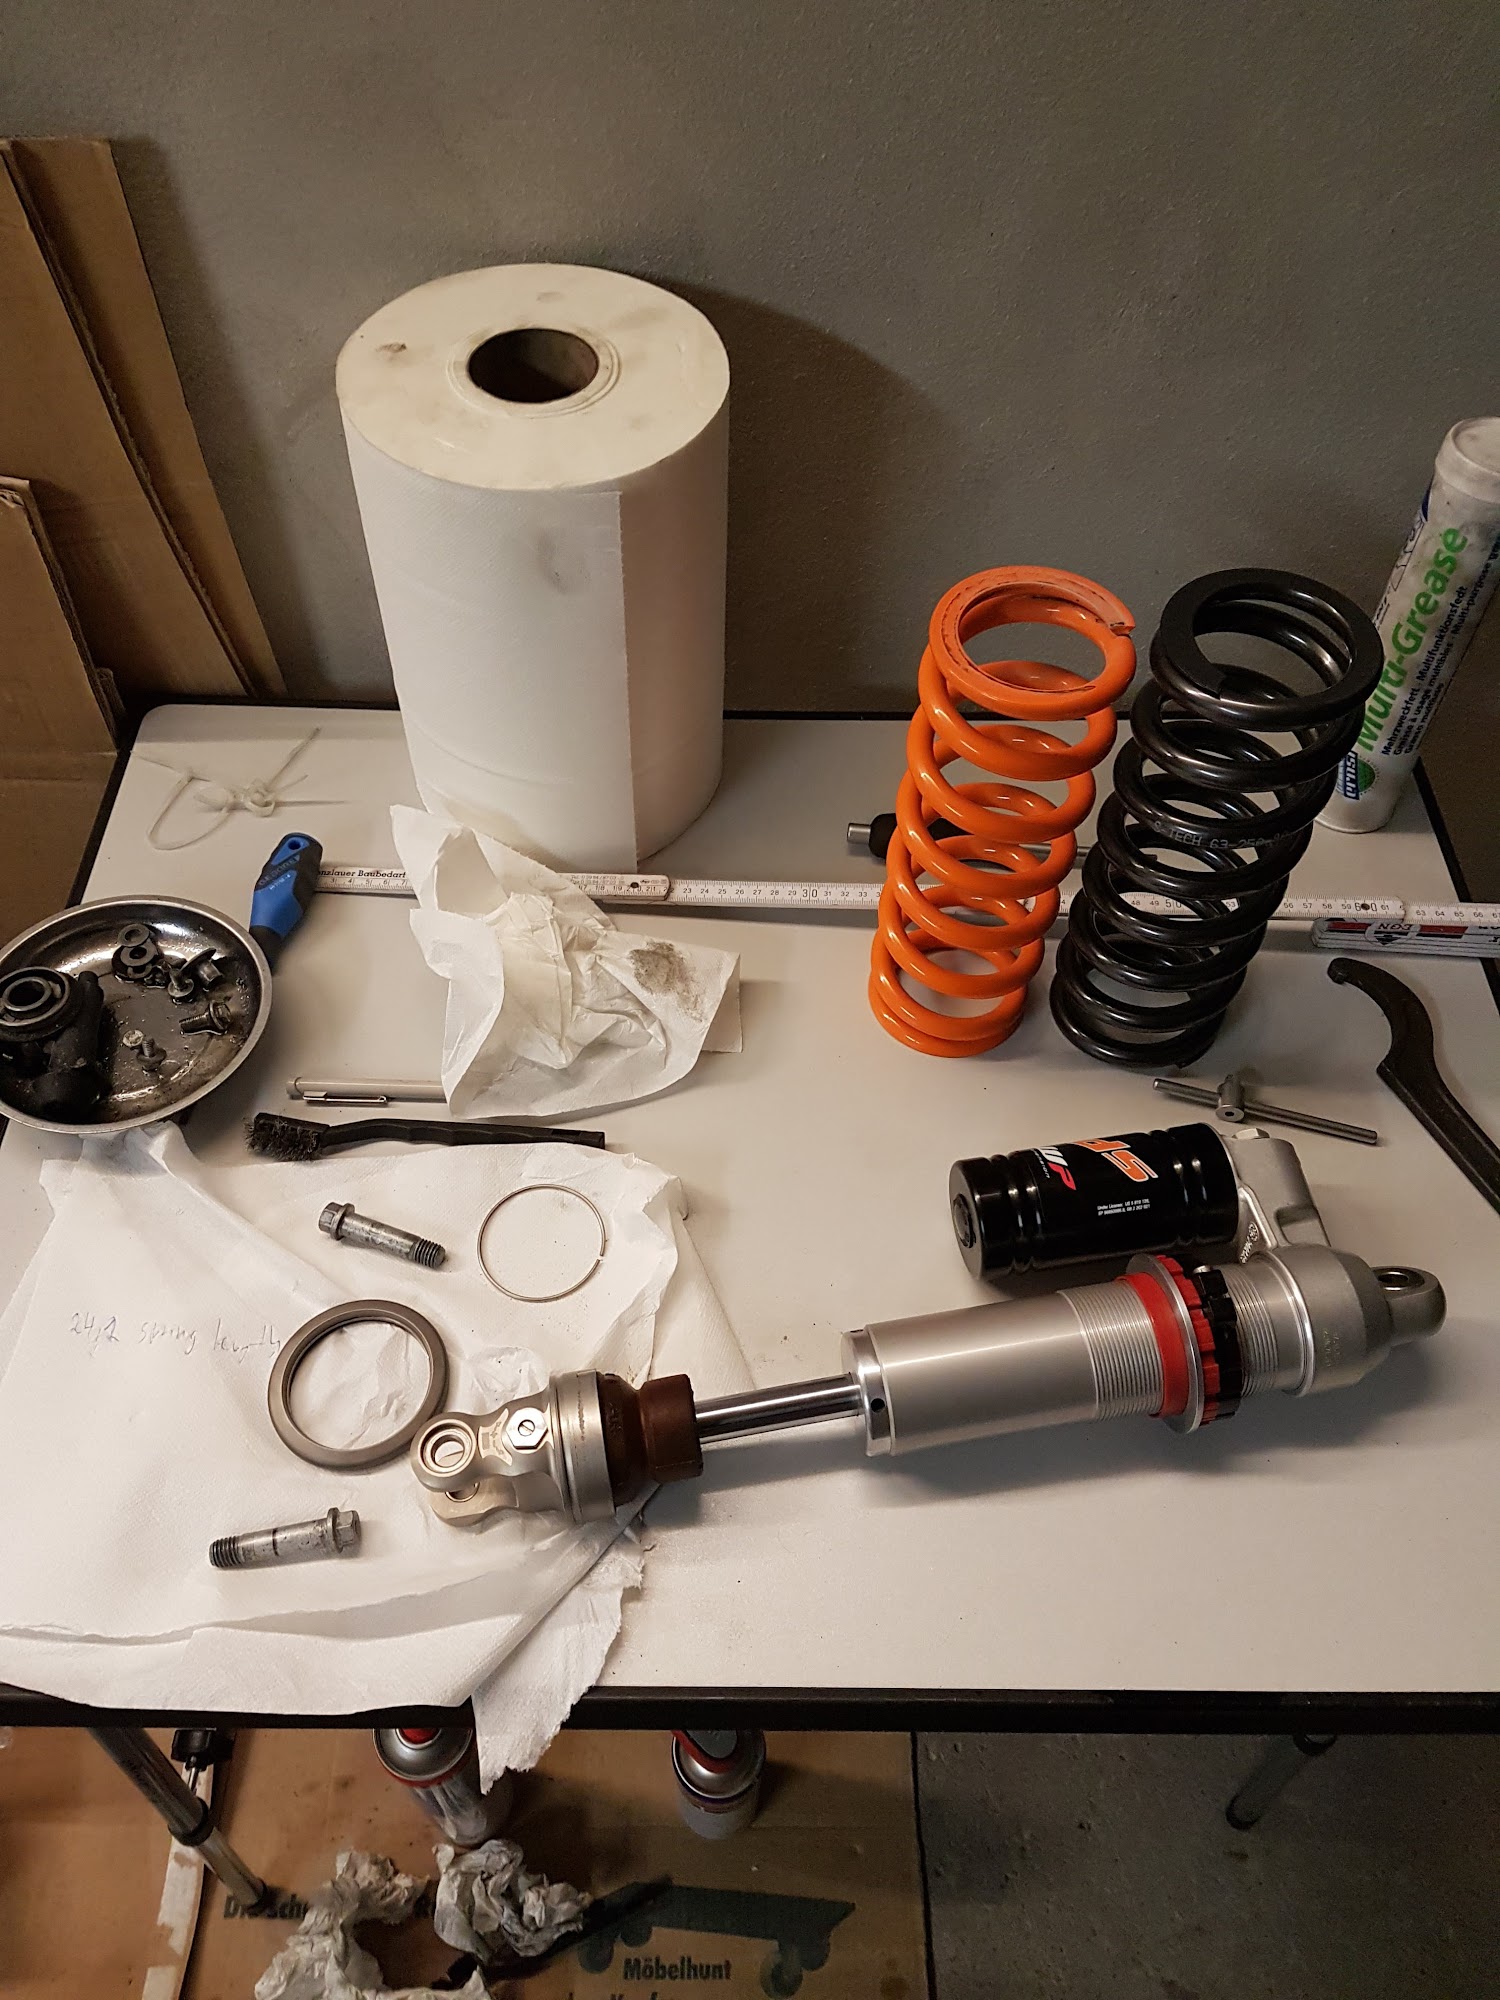
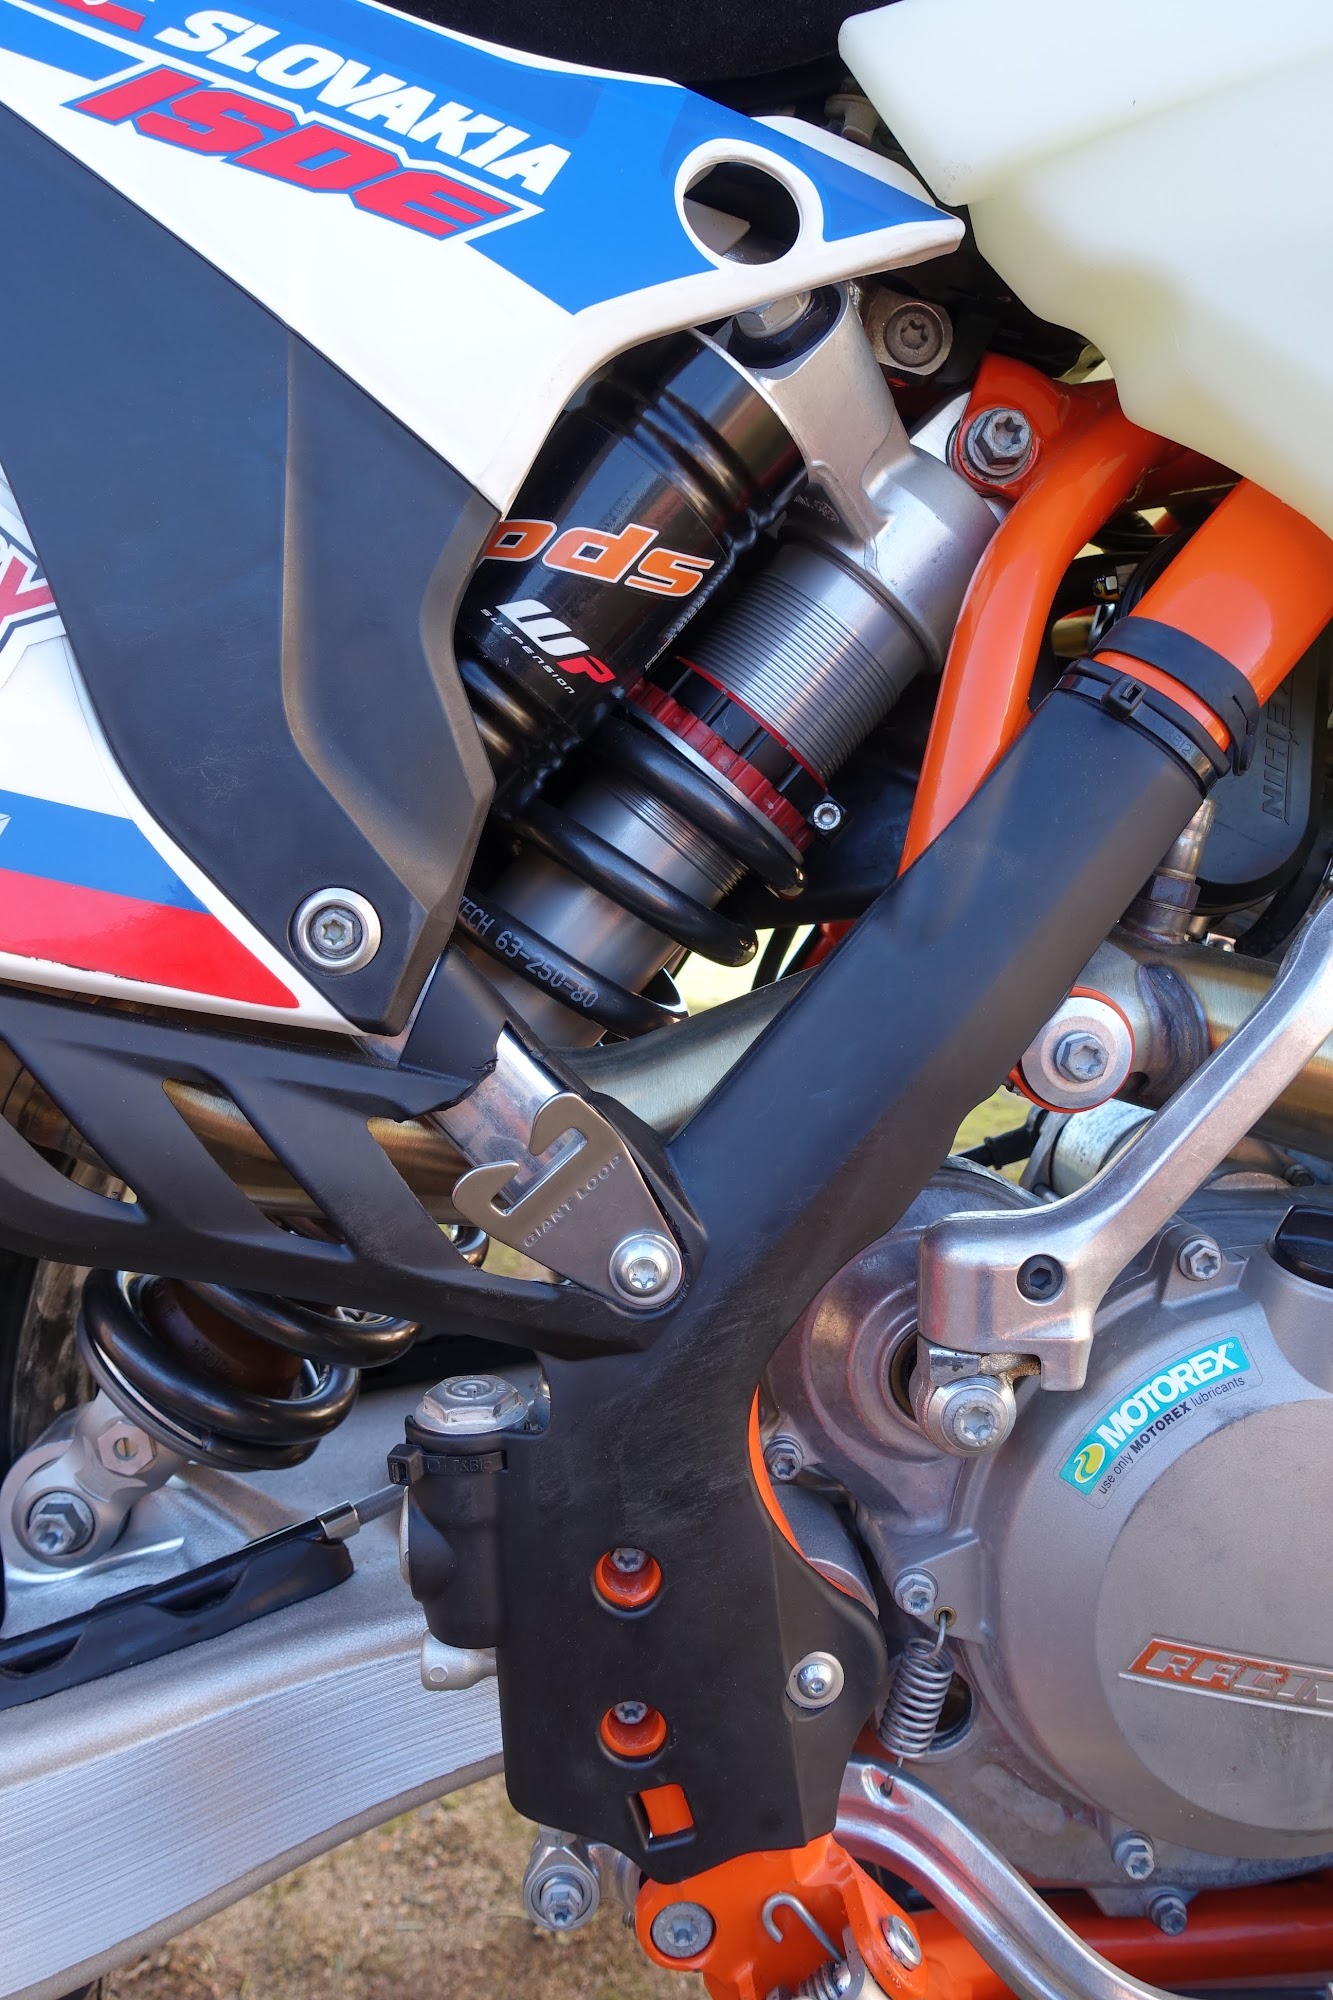
Mods to the suspension only includes adding a stiffer, 80 N⋅m, spring to optimize for carrying luggage. Setting up proper preload and sag with an estimated total weight of around 115kg (Rider fully geared incl. camel-back ~95kg plus luggage ~20kg). The forks remain stock, but properly adjusted to the weight. With this setup I’m just about reaching ground with tip toes, with no luggage, and properly hit ground with ball of the foot when luggage added.
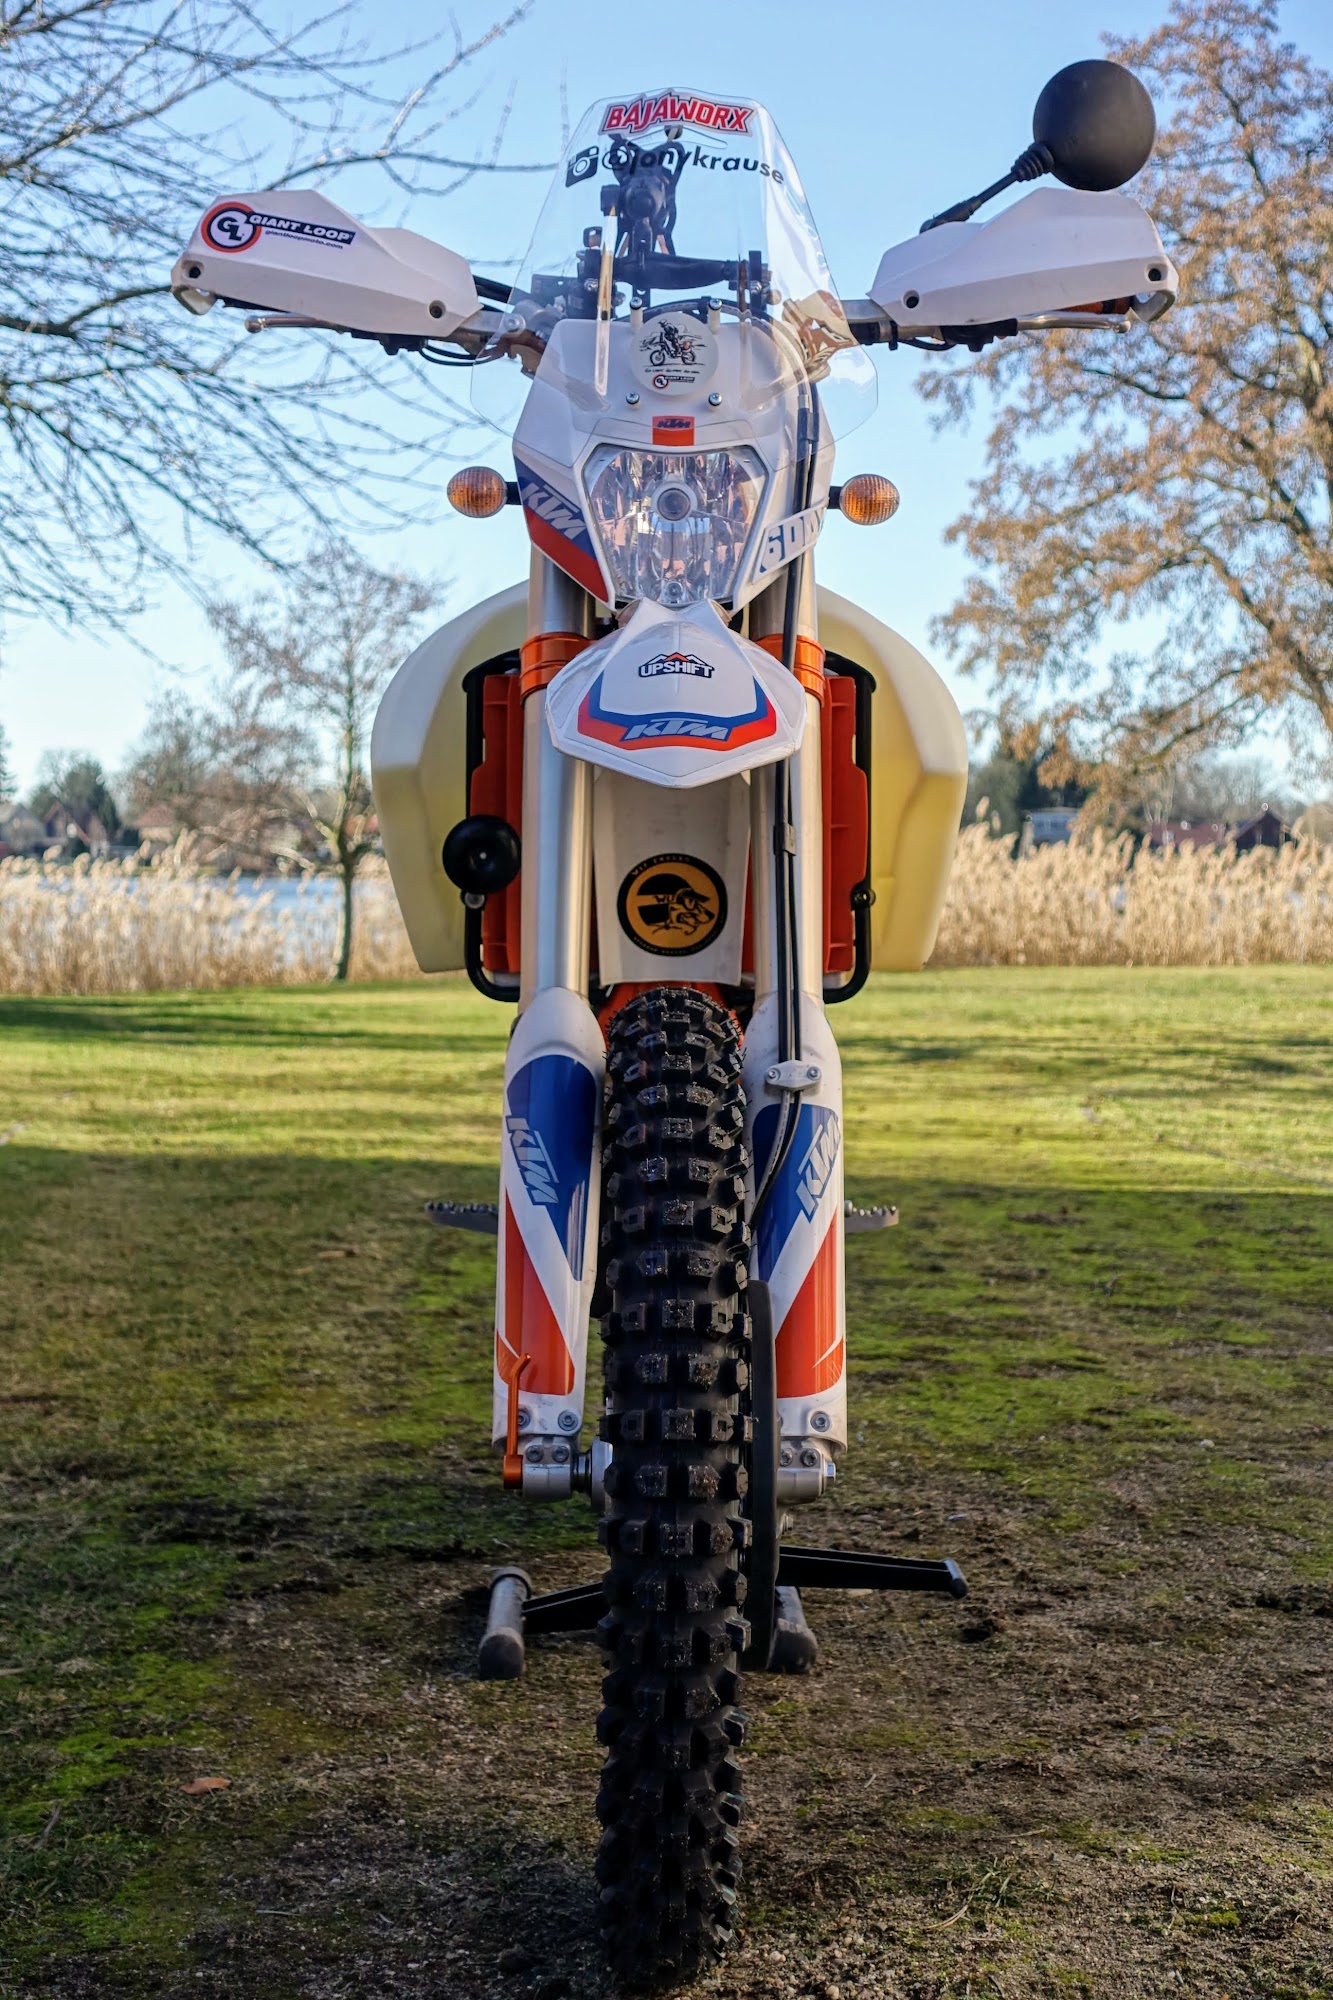
Windscreen
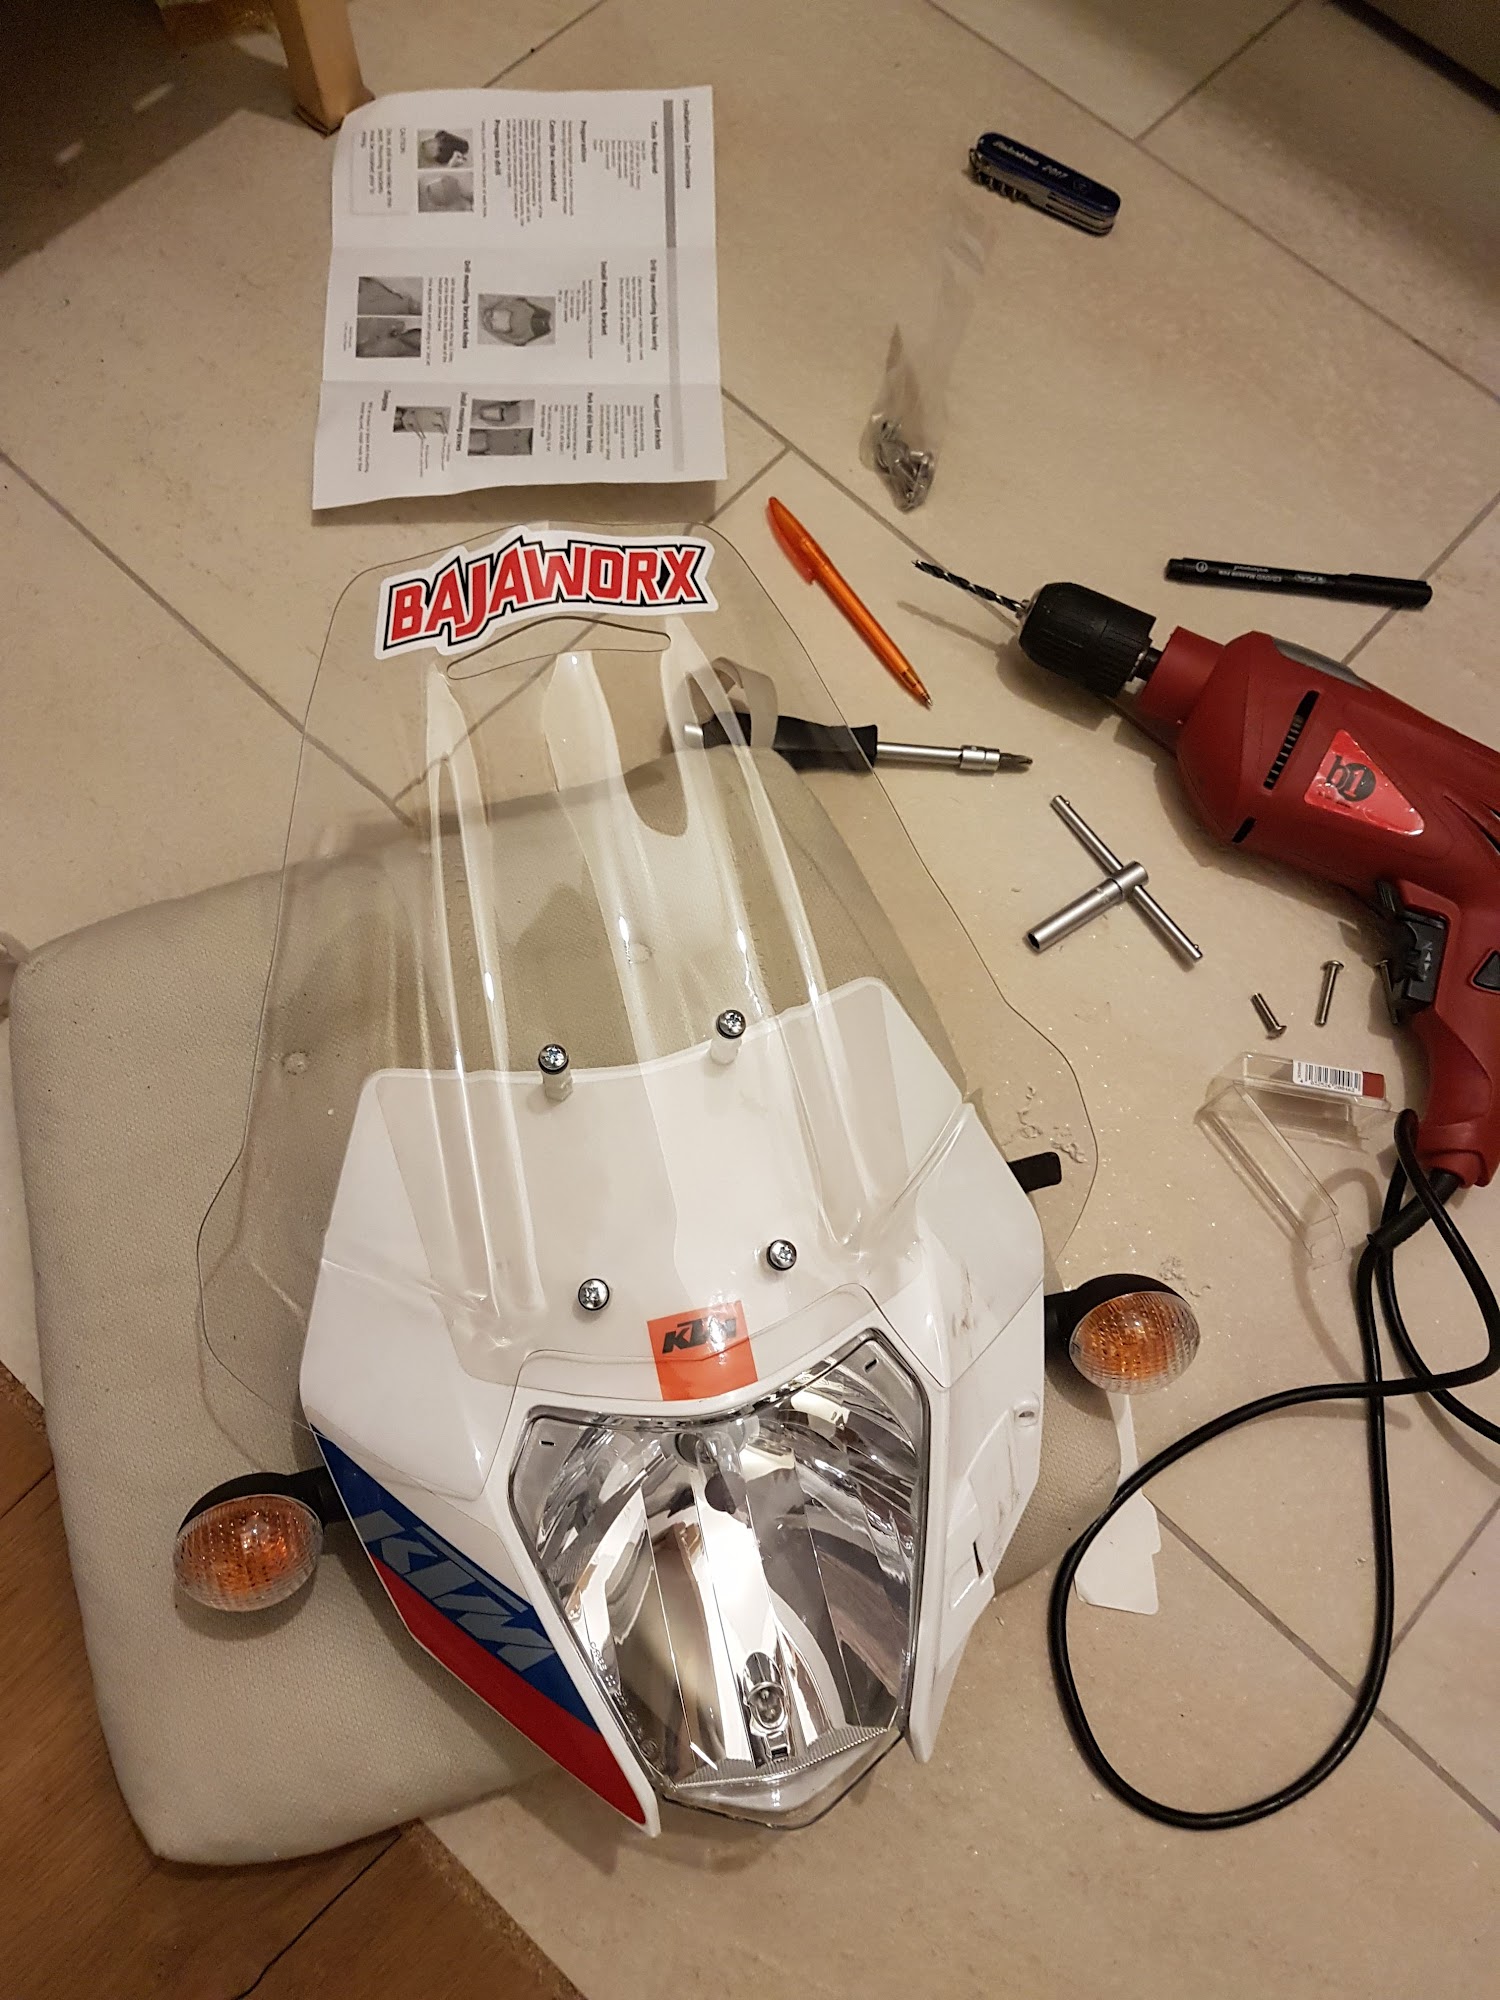
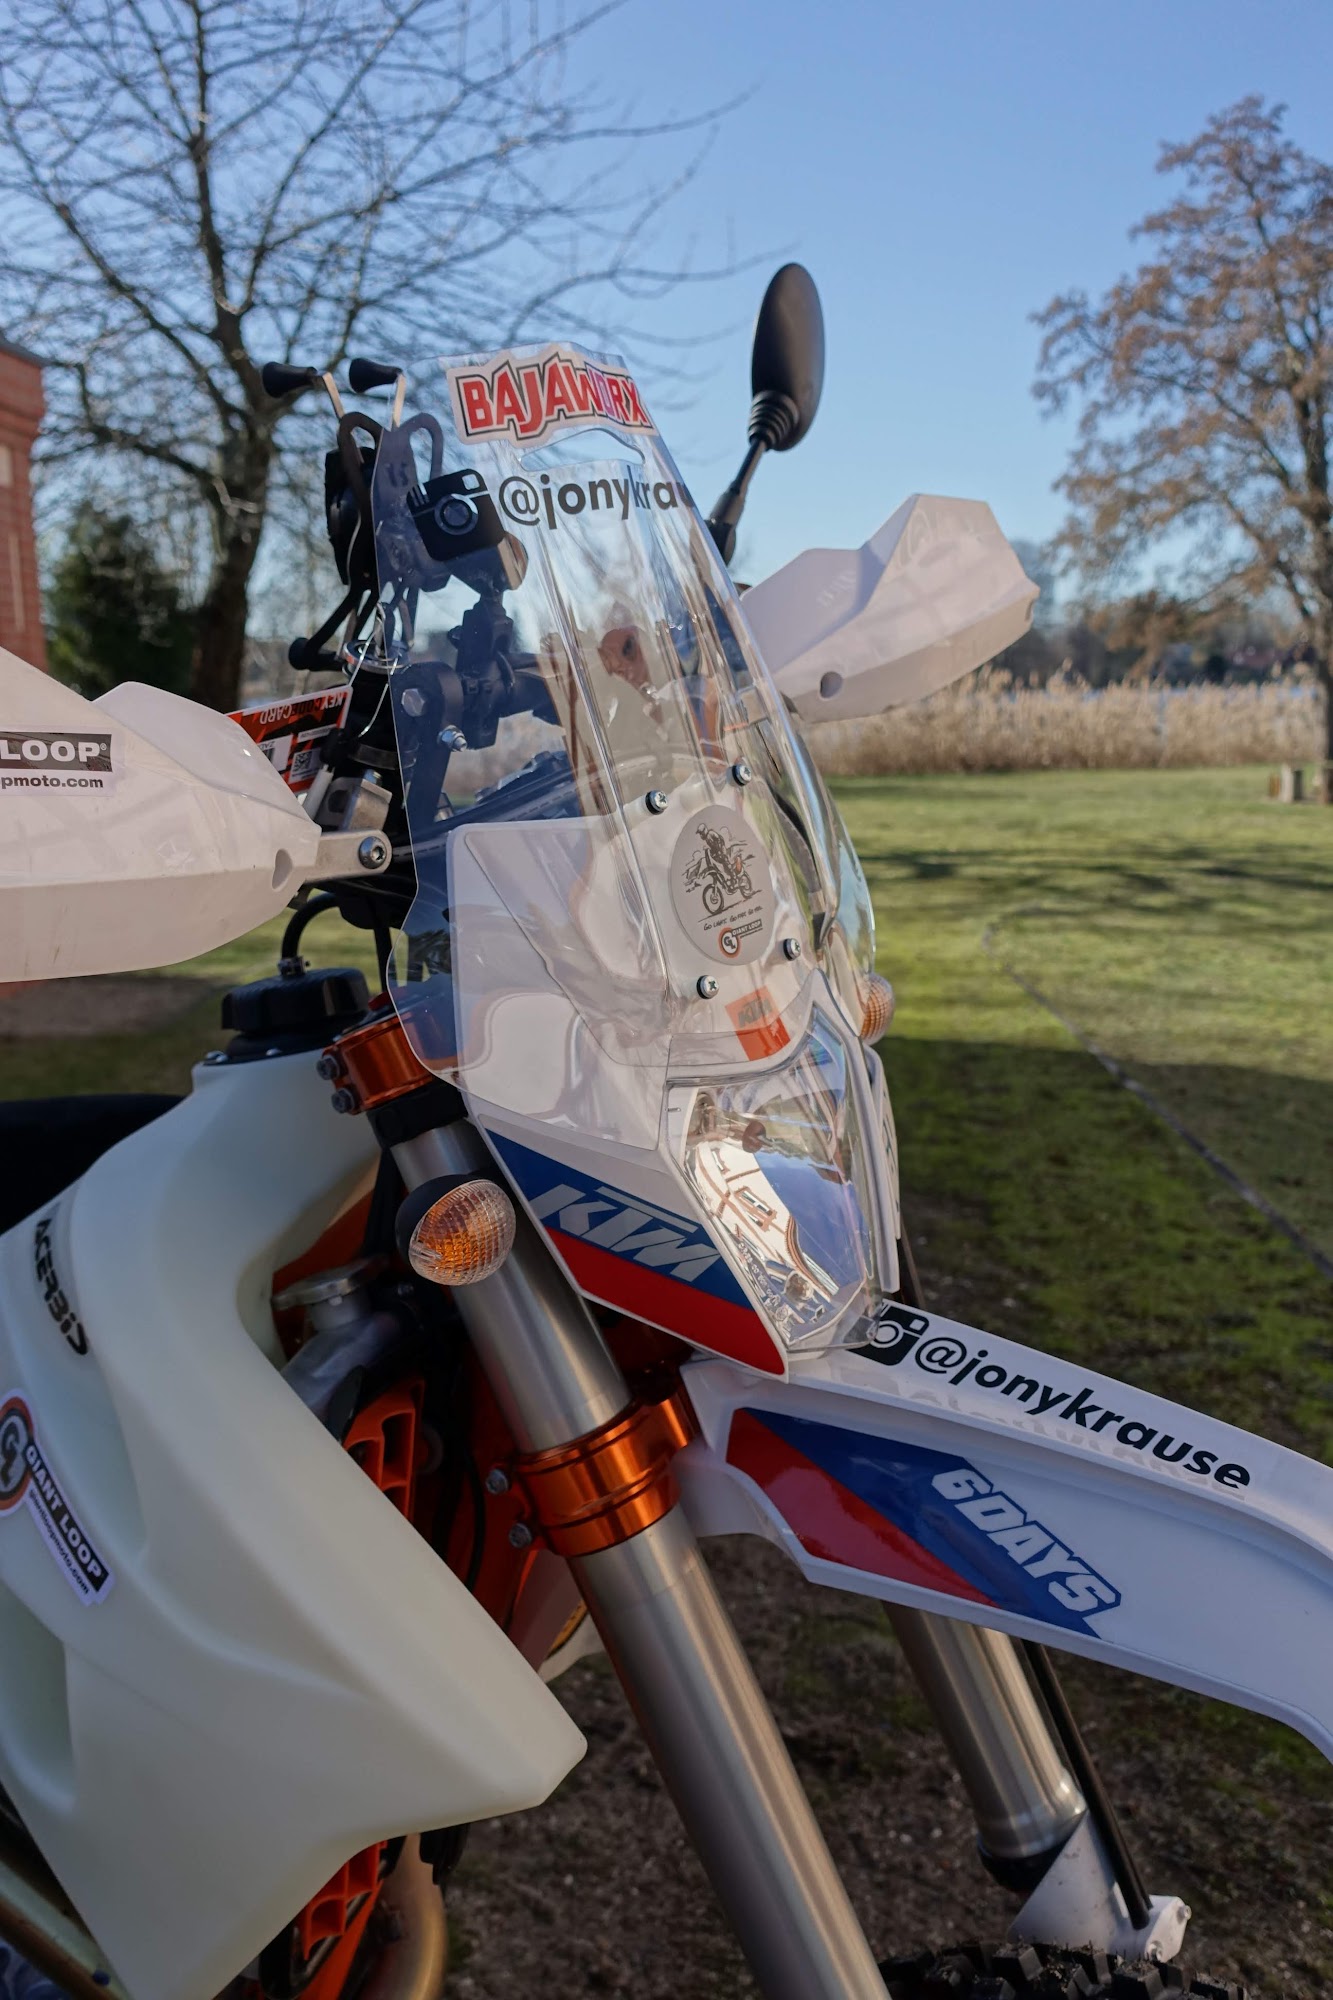
Some folks might argue this is lame and removes the dirt bike character. In fact it’s not really necessary and might also worsen the situation depending on riders height and air flow. So this is a part where everyone has to fiddle around and customize for her own needs. I decided to go for a little windscreen and tried to come up with a DIY version first. In the end decided to go with the Bajaworx enduro windscreen. It’s a perfectly sized minimalistic windscreen that does work really well for me. I mounted it with custom nylon spacers between headlight mask and shield, and adjusted the shields angle several times. As another spacer, I added a OEM KTM bar pad that sits between windscreen and speedo. Adjusted like this, it now serves very well as protection for me and equipment. The air hits just into the lower parts of the helmet with smooth air, not turbulent at around 90km/h cruising speed.
This basically concludes the Comfort & Ergonomics parts. Of course setting up levers and pedals is also part of it, but this a generally advisable thing to do.
Fuel Tank
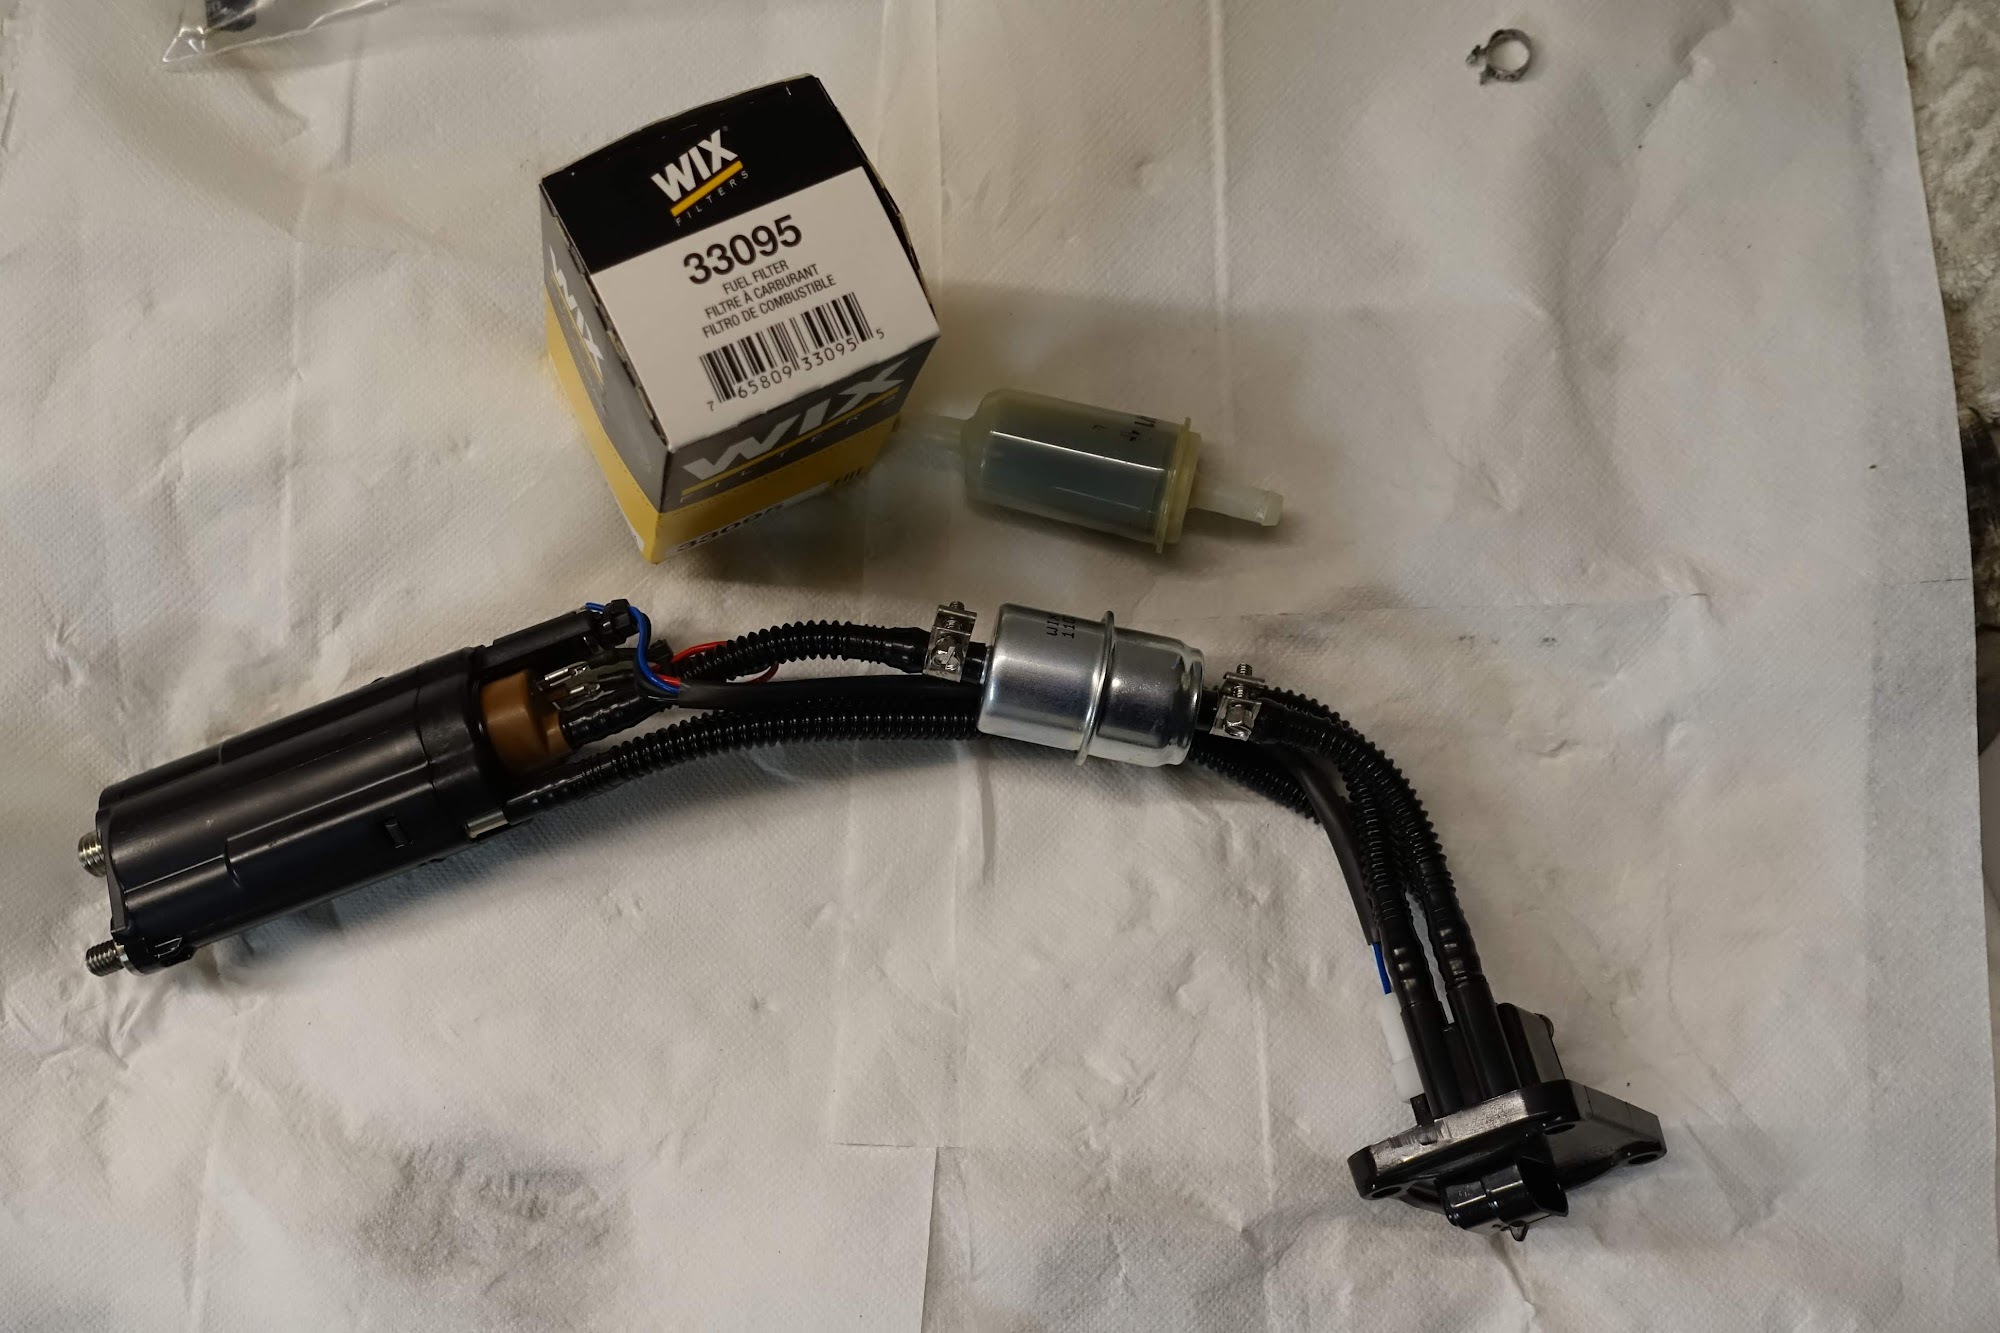
A obvious change to make is to the fuel tank as stock one just is too small for long distance rides in remote areas. I went with the biggest fuel tank available, that is the Acerbis 20l tank. It’s very similiar or same to the Powerparts 19l tank. I guess one has counted in the fuel pump volume while the other is way cheaper. I’m very happy with shape of the tank as it allows for tank bag fitment, protects radiators and still is slim fit on the legs. A smaller 15l tank might also do it, at least in Europe but having the option of fueling up to 20l is just great. I additionally changed the stock MAN in line fuel filter of the fuel pump to a more robust WIX 33095 one, which lasts longer and is less likely to crack. To prevent dirt and water getting into the engine I use a Guglatech fuel filter inside the fuel tank.

Aluminium Handguards
I decided to go with KTM Aluminium Handguards instead of the stock ones. Mostly to protect handlebar and levers when dropping the bike. For Hard Enduro there are diverse opinions on these, as they might cause injury when slipping in your arm/wrist in the case of a fall over. For traveling the protection part completely outweighs in my opinion.
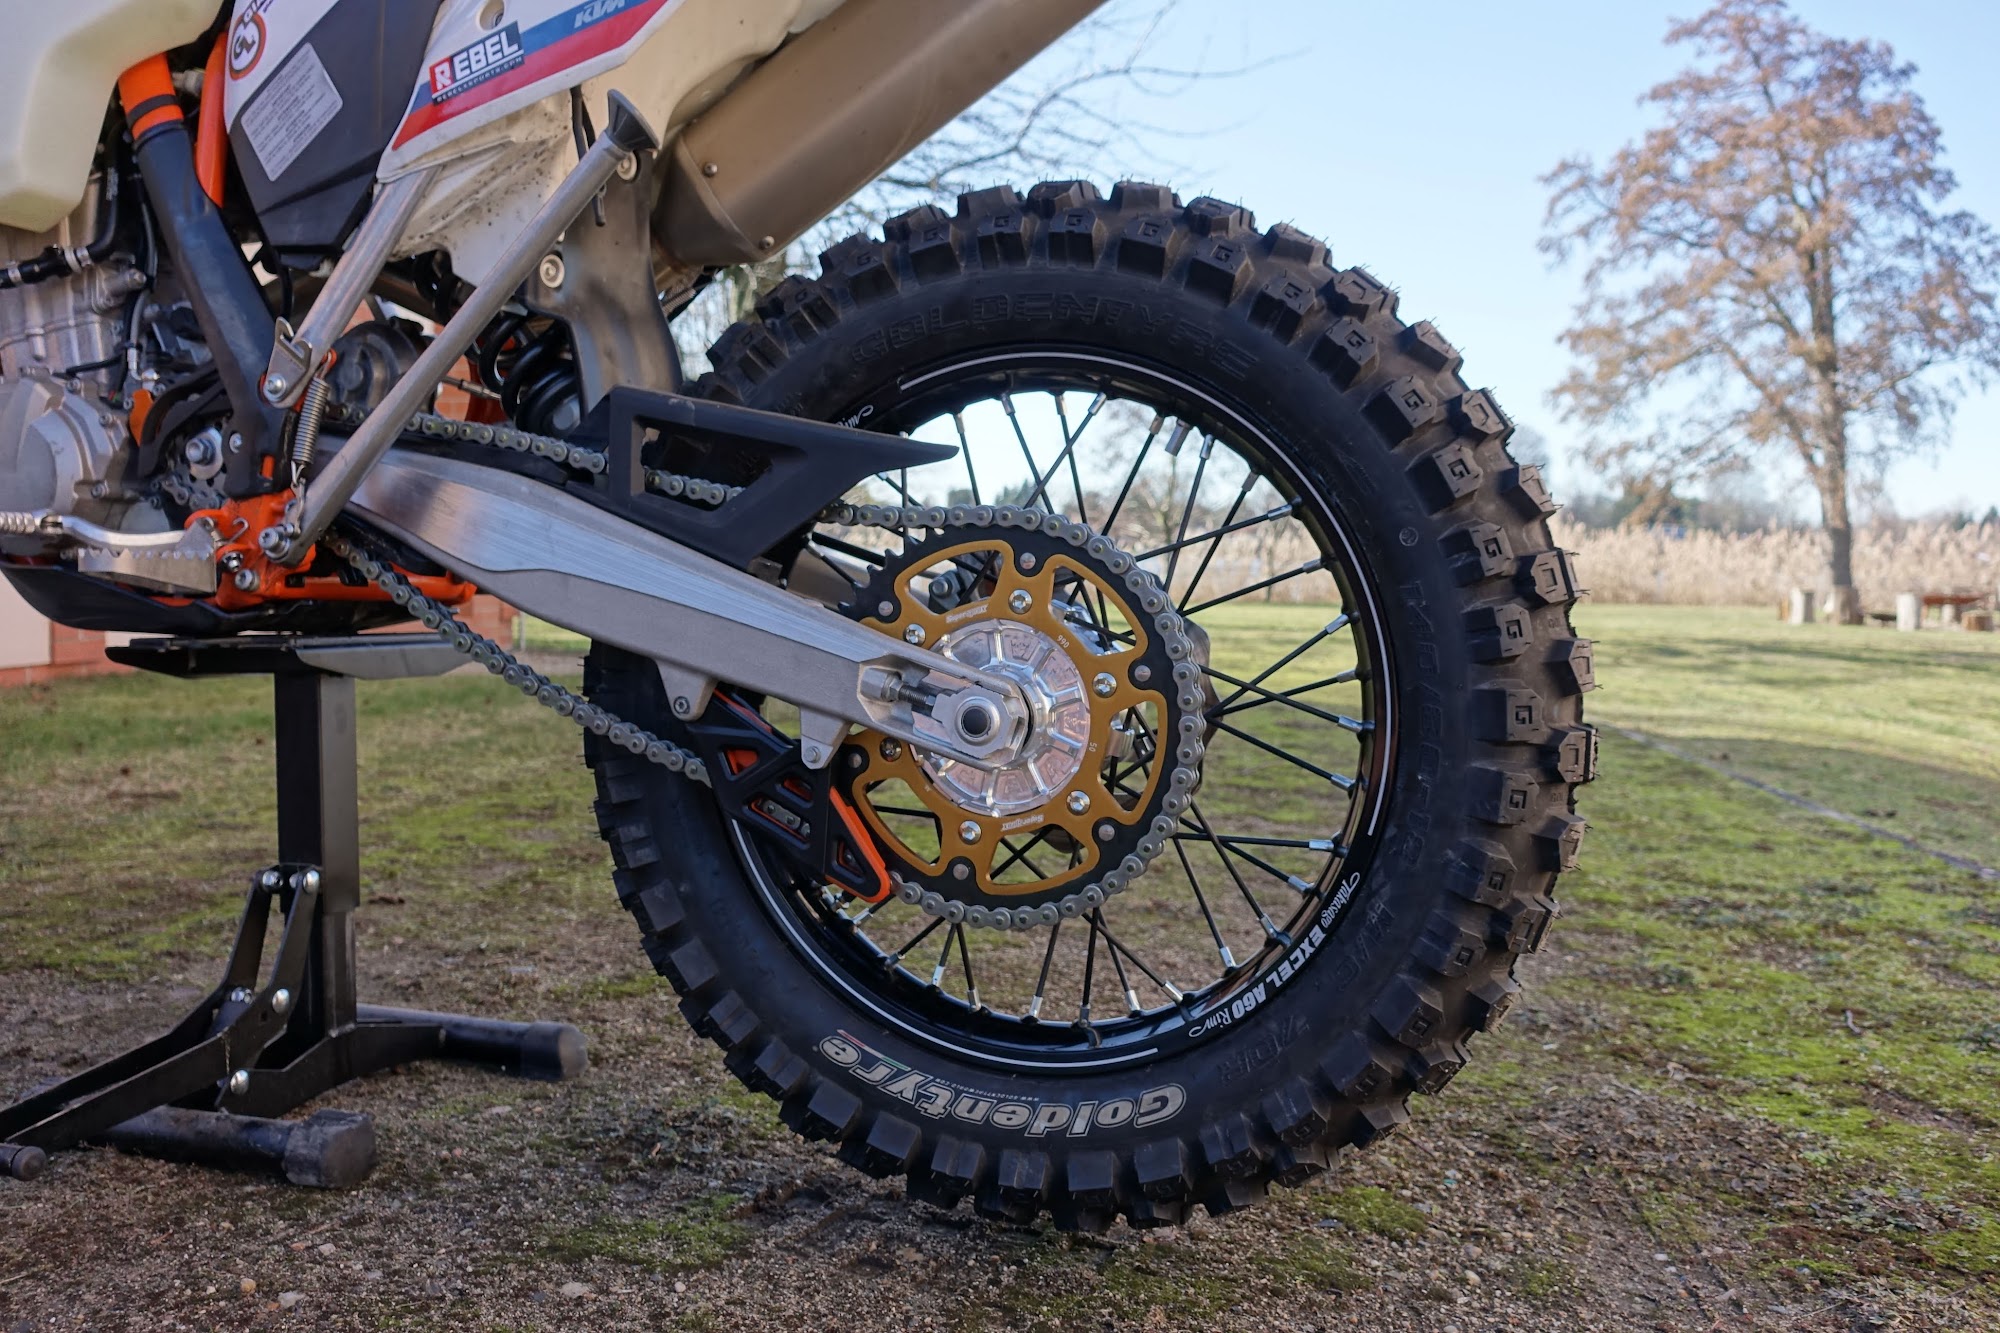
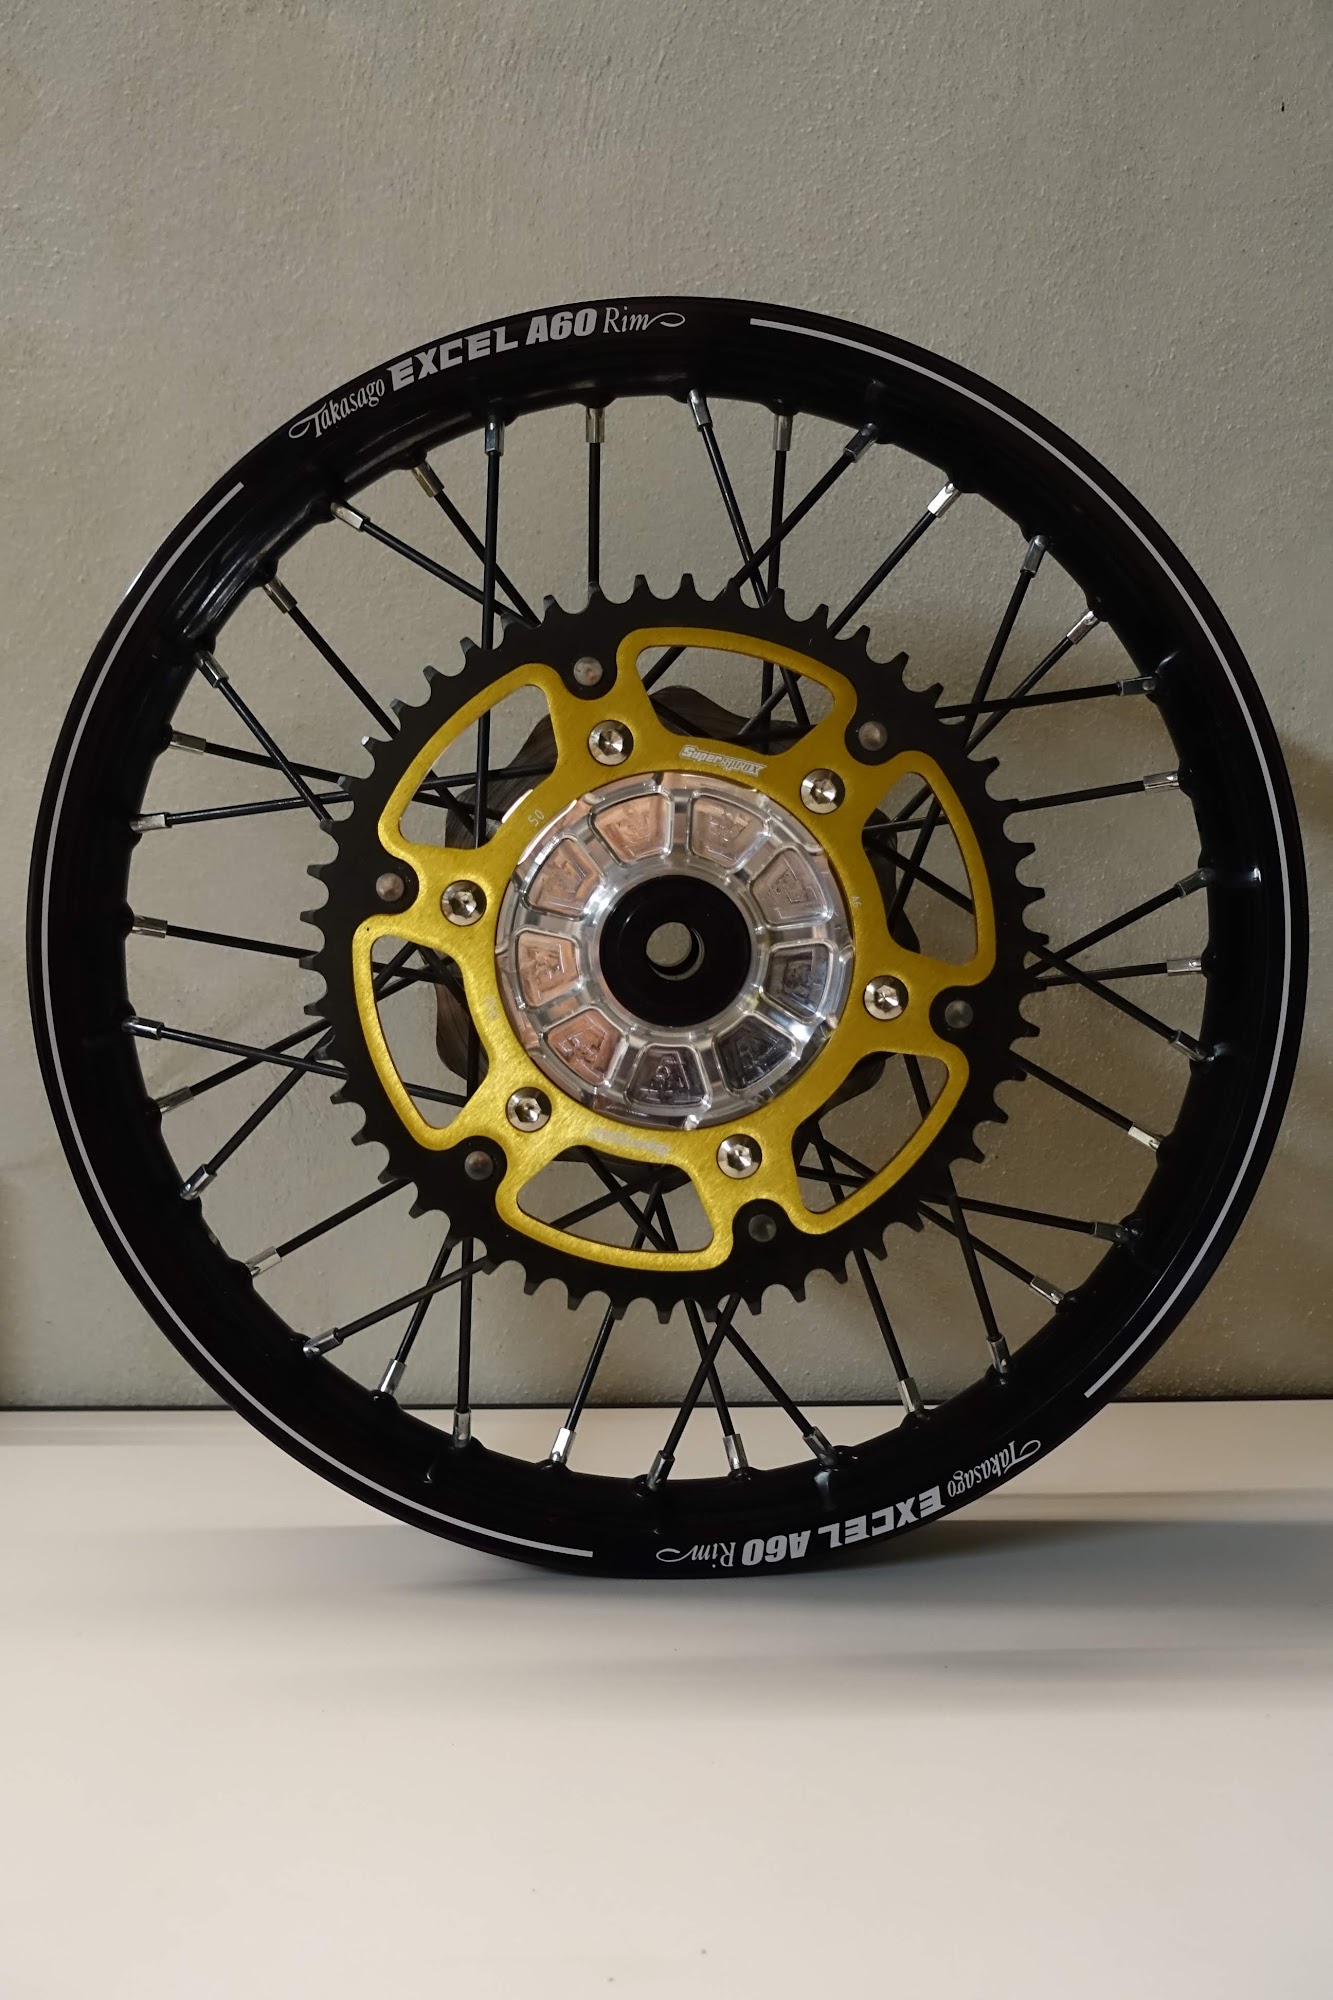
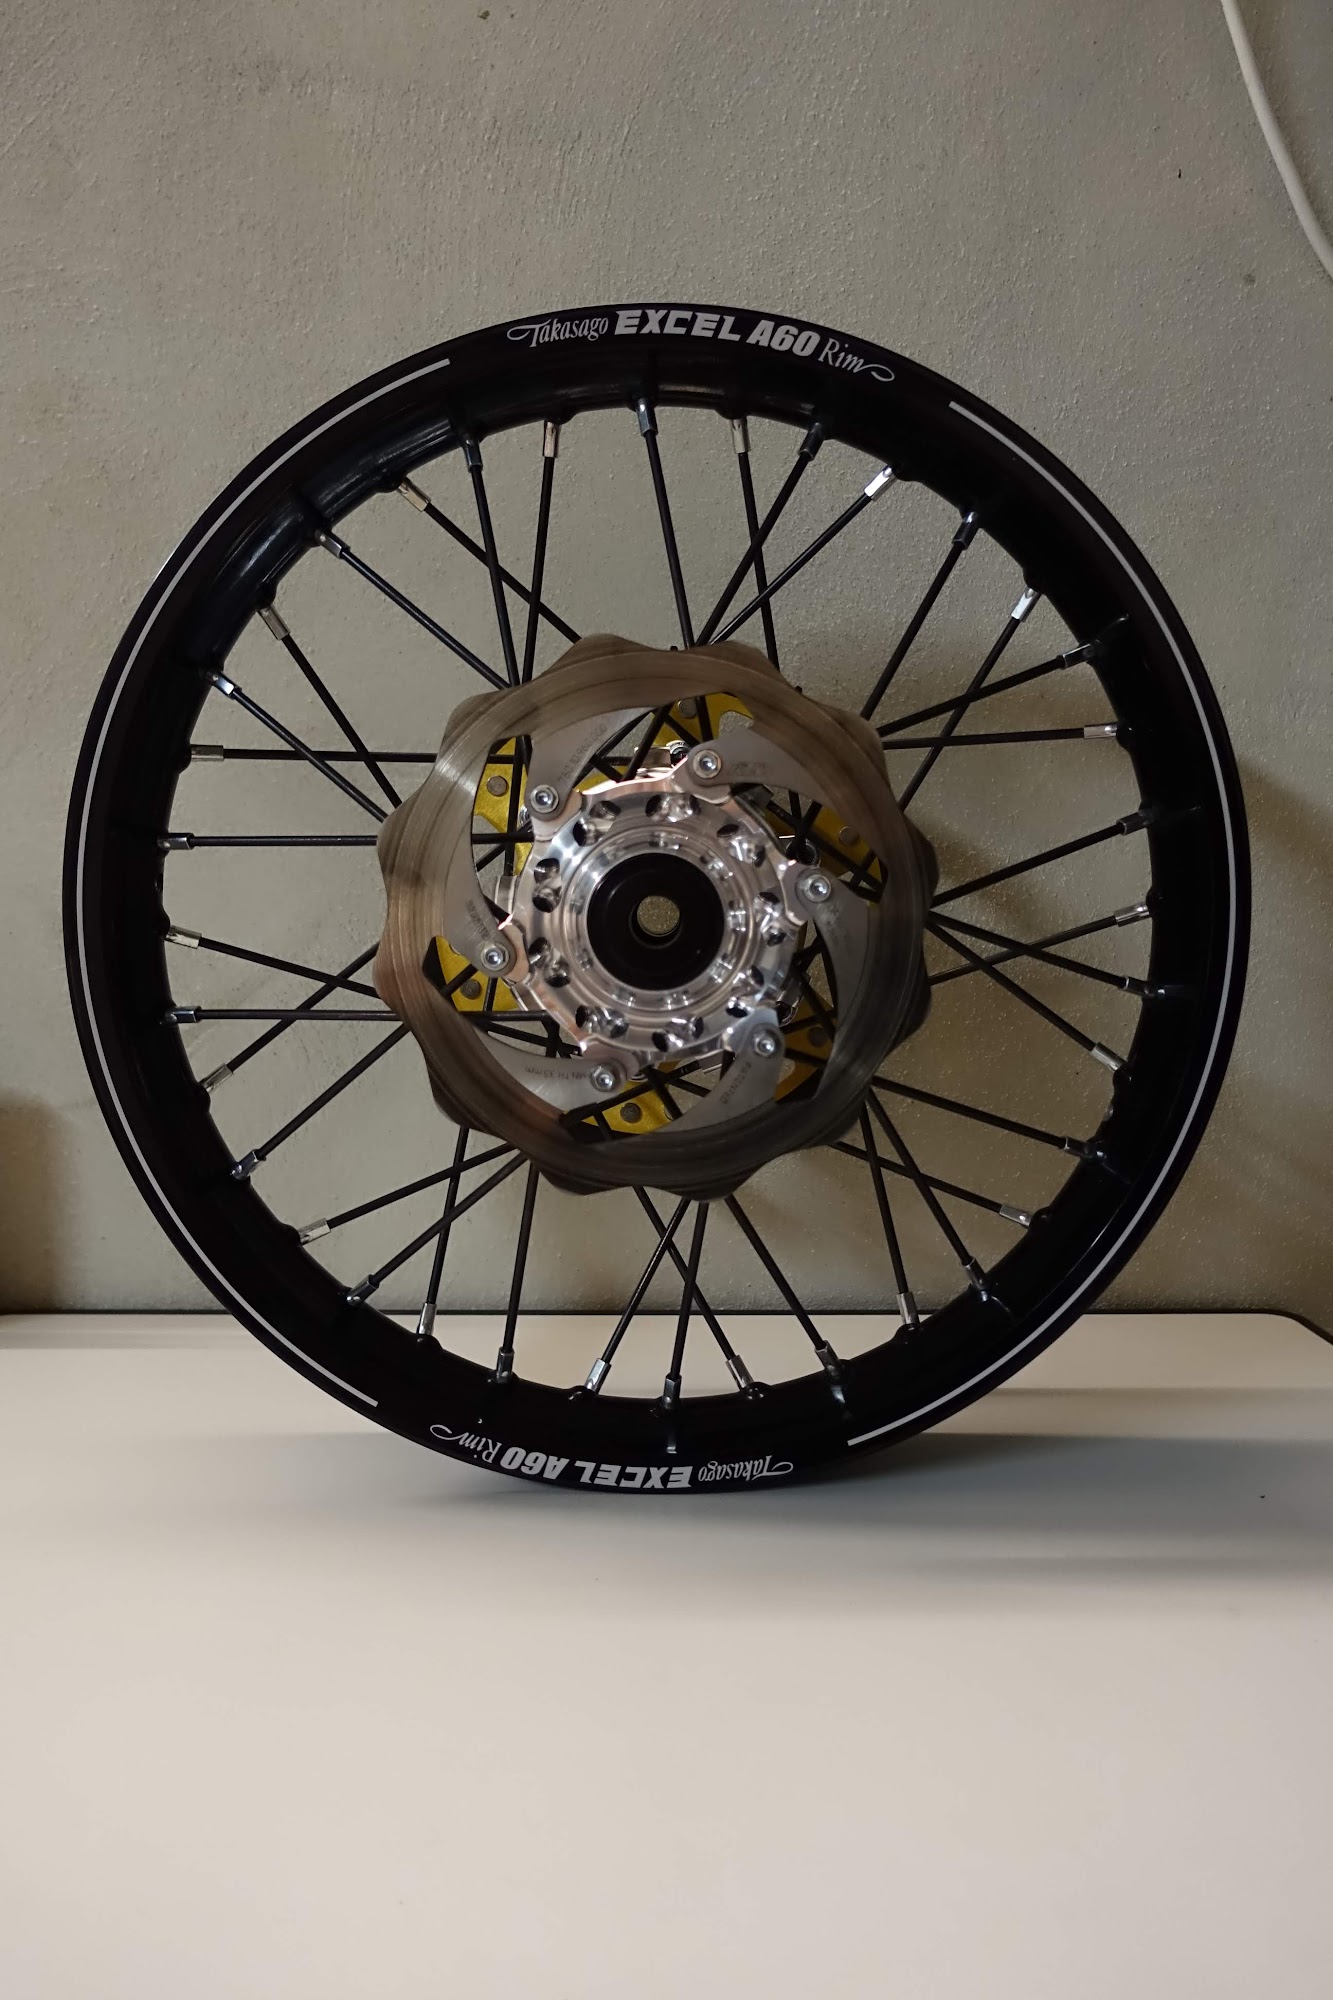
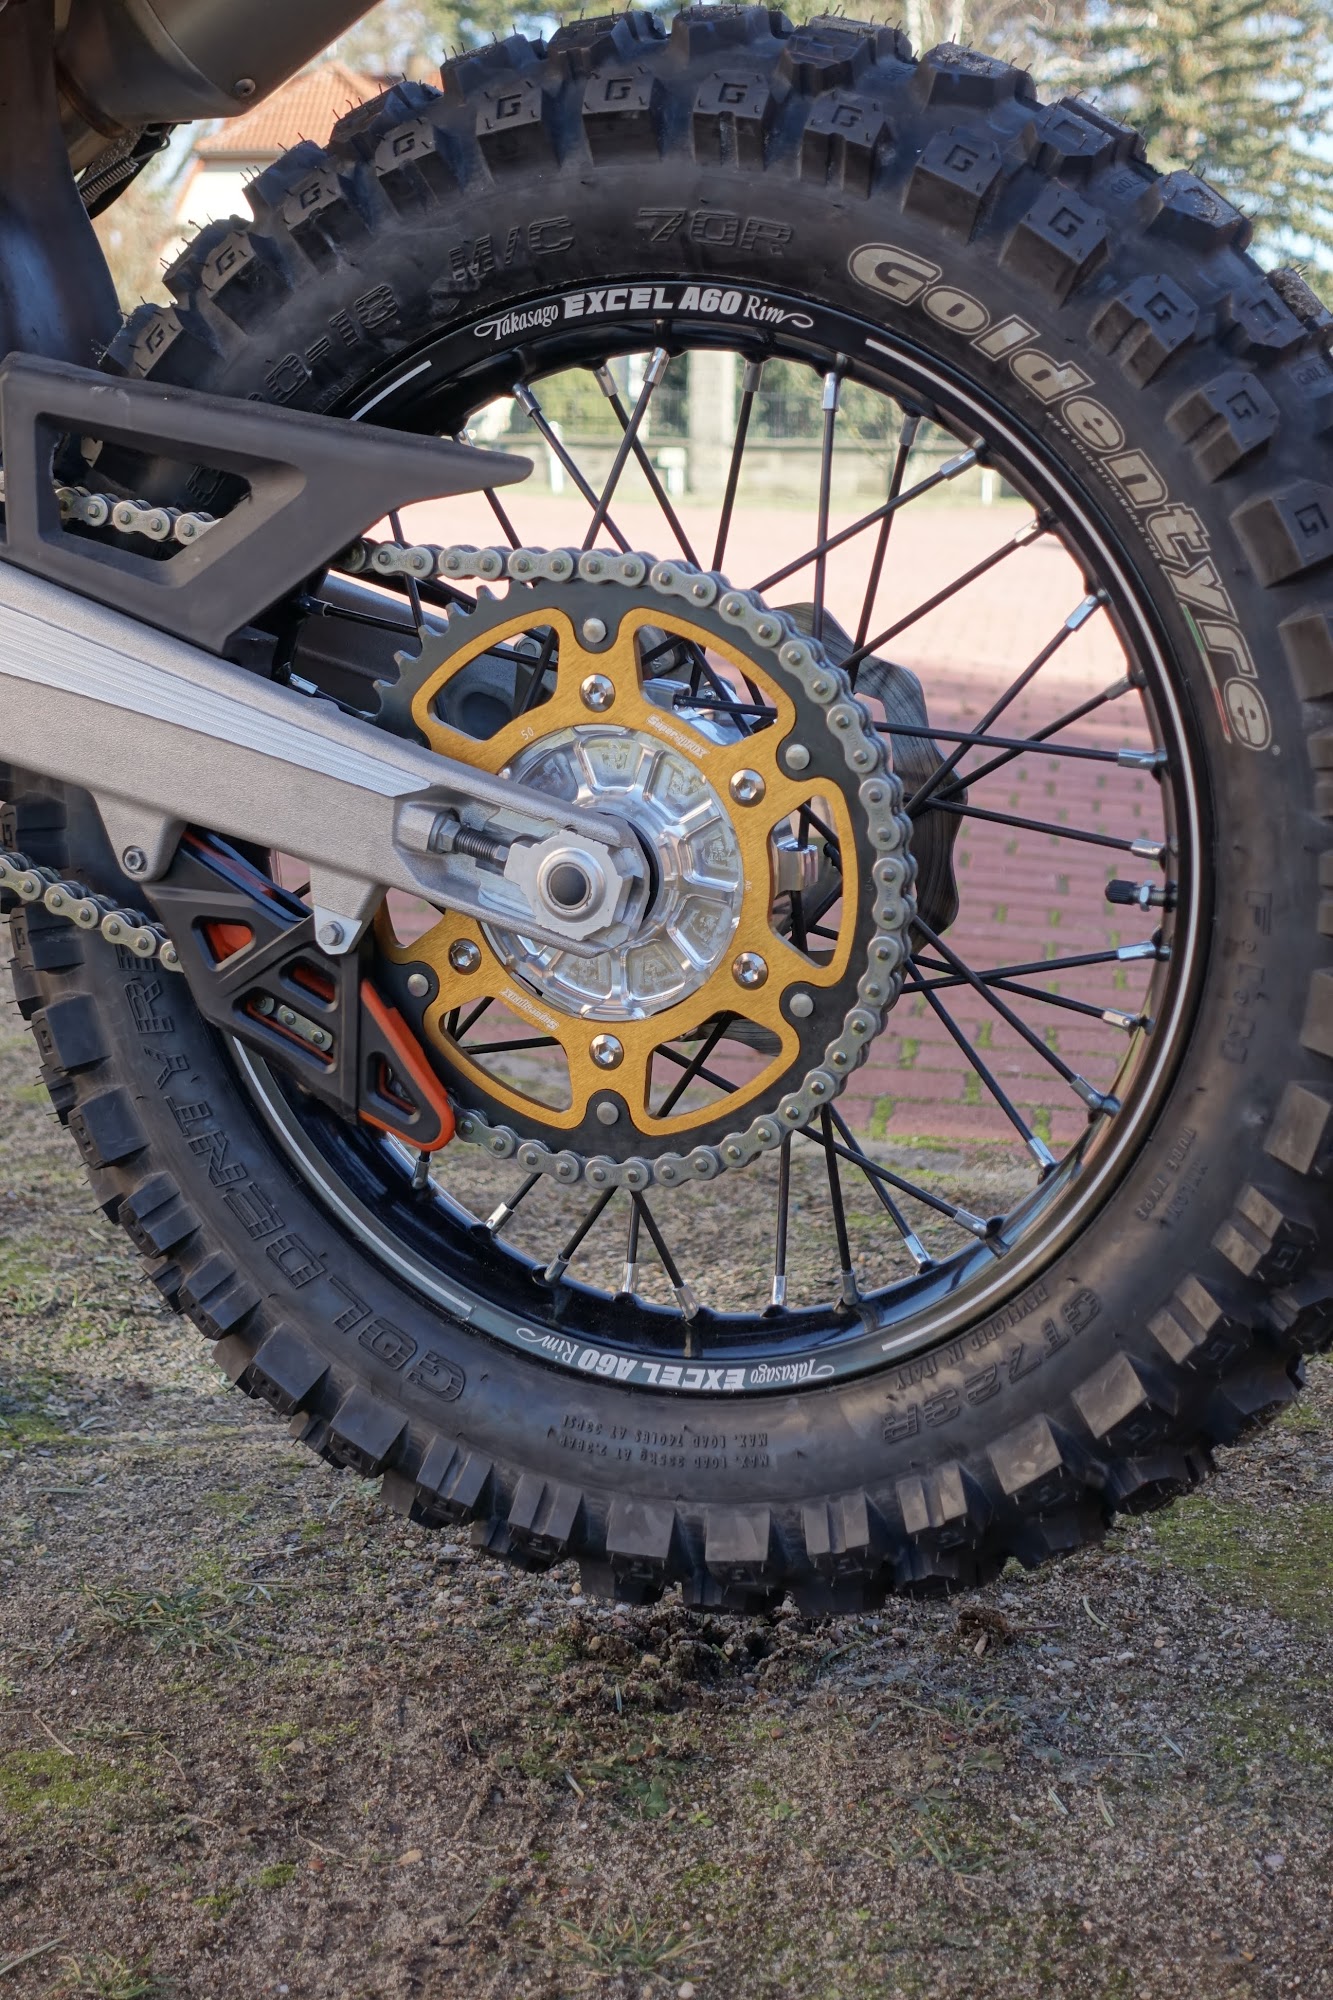
Cush Hub
Debatable if this is a necessity but definitely gives me piece of mind. The bike, primarily, is not made for riding on pavement and when taking it to a terrain it’s not built for and go even on long distance rides, I want to do everything possible to save on maintenance and take it easy with the engine. In dual sport reality there, of course, will be sections riding on pavement. The additional dampening built into the rear hub causes less chain chatter I noticed and and most importantly should decrease load and abrasion of drive train and transmission. I went with Haan Wheels Excel A60 Cush Hub Rear Wheel with bigger spokes for increased durability. The front rim stays stock and is evaluated as good enough by me.
Gearing
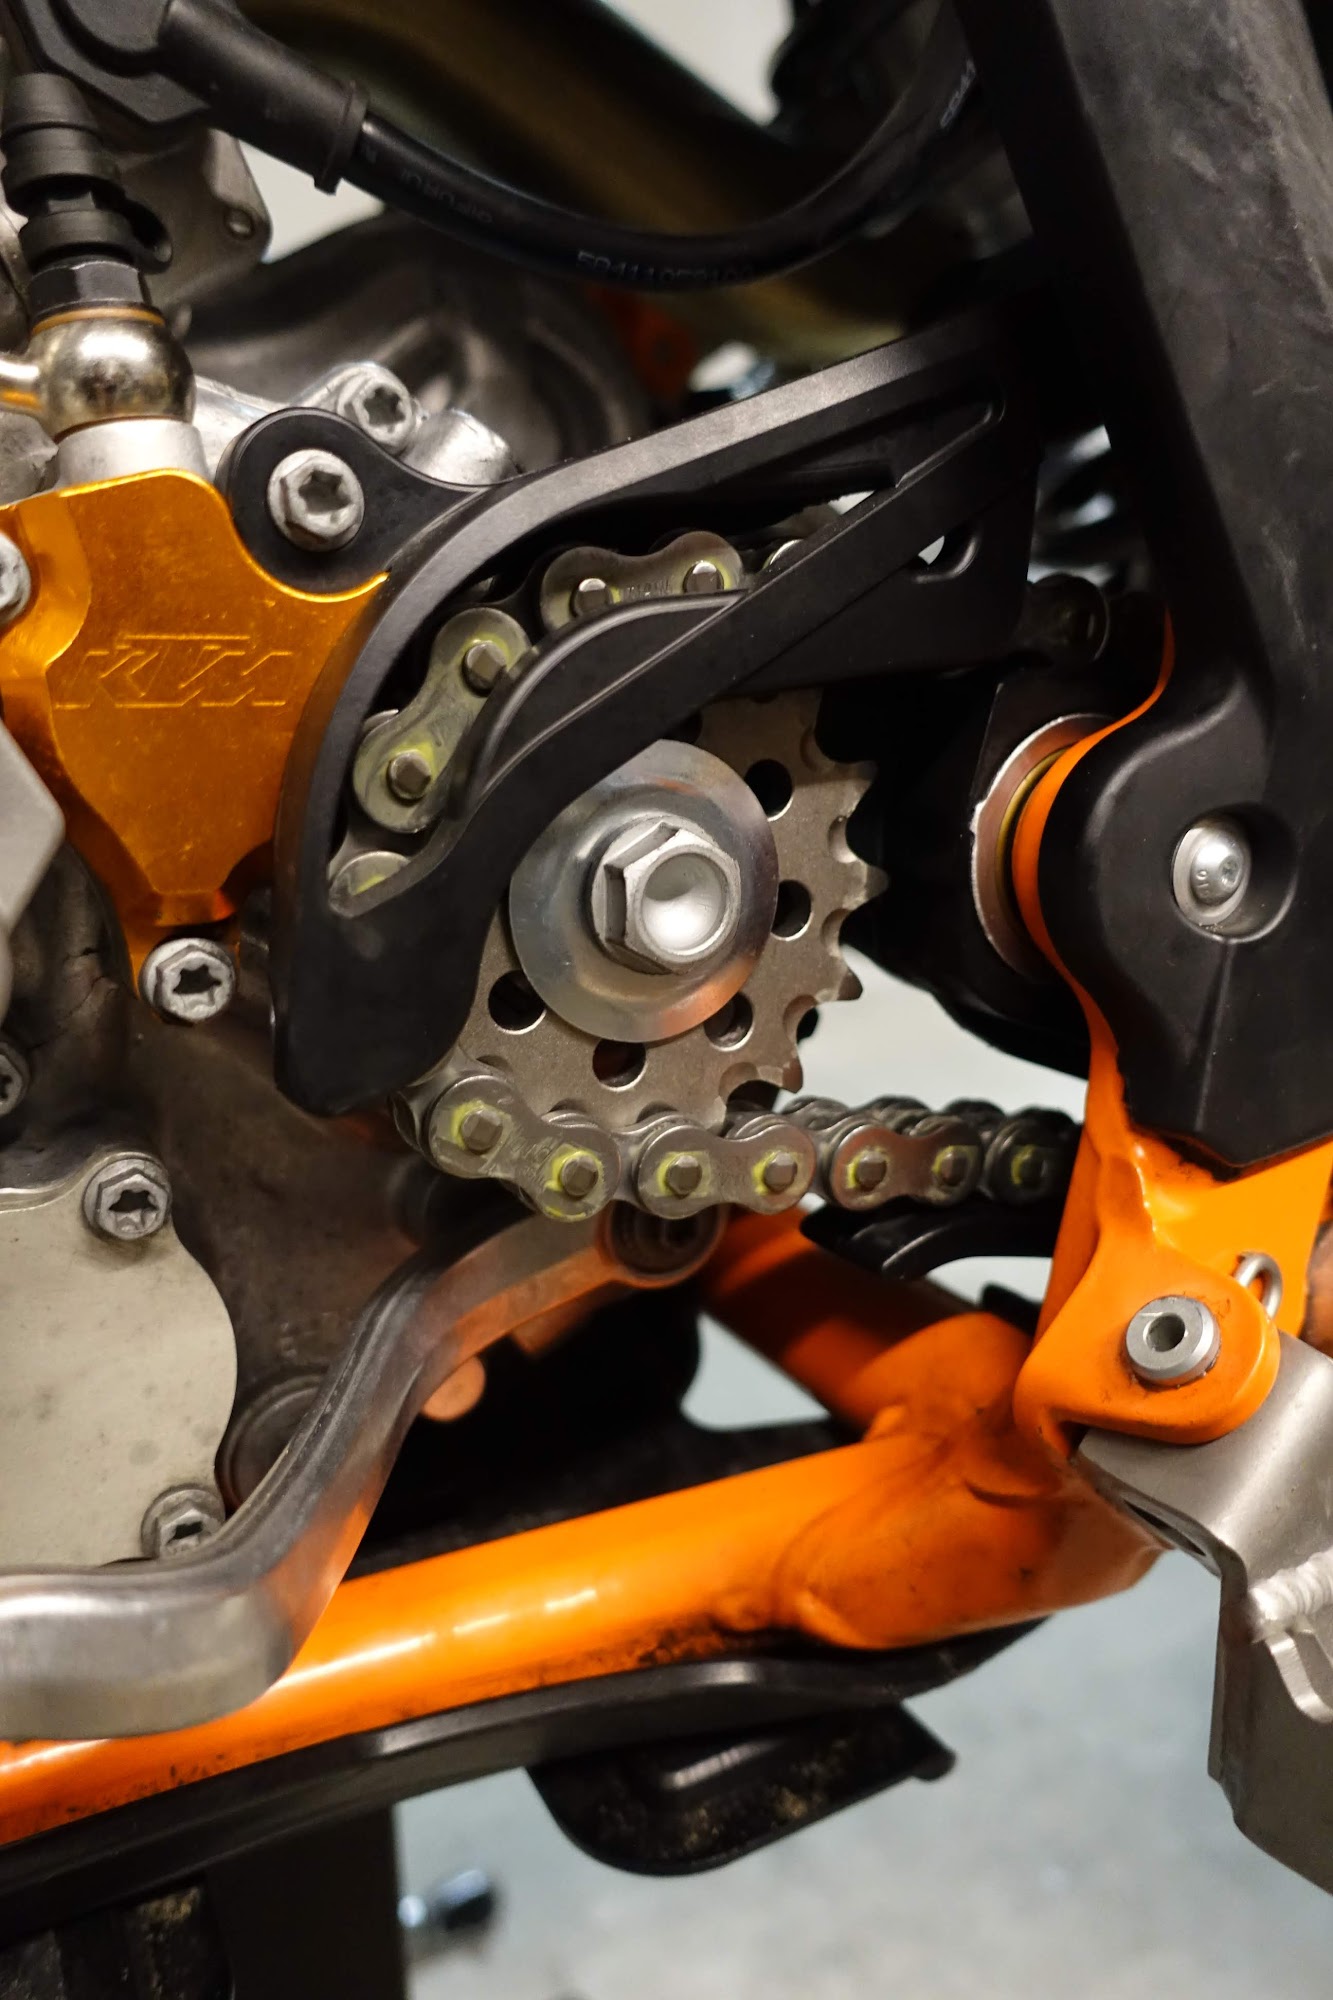
The 450 EXC comes stock in Europe with 14:52 gearing. To be able to go easy and low rev on 90 km/h – 100km/h cruising speed I found gearing of 15:50 as perfectly suitable. This allows for riding the stock chain length and still also works fine on slower single trail sections. With this setup the bike tops out at over 150km/h which is more than enough. I’m using 520 DID ZVMX chains and are pretty happy with them.

The Cockpit
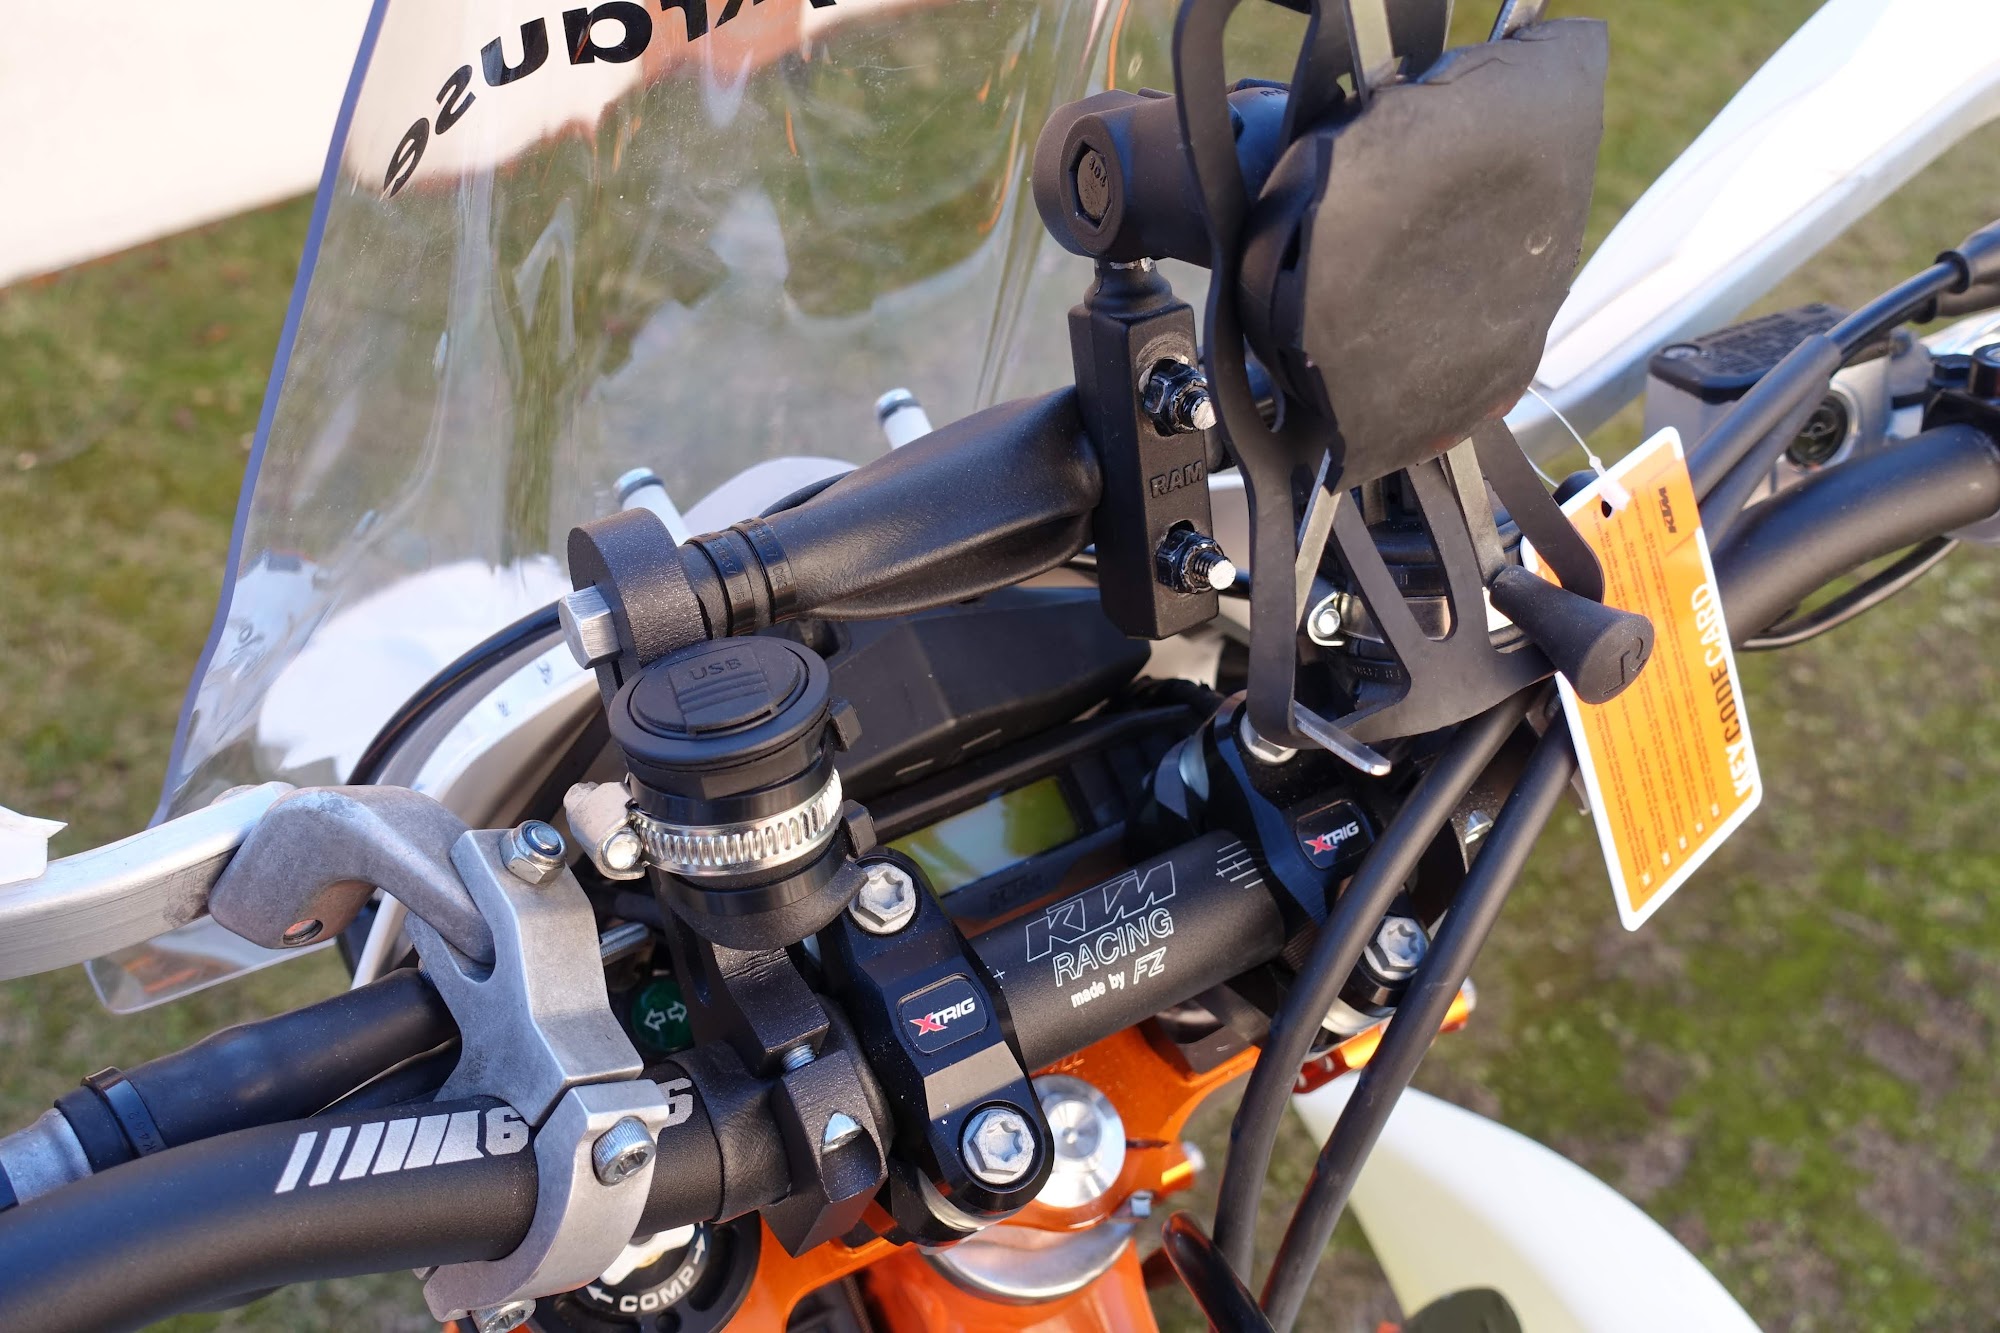
As mounting base for Phone and Navigation, I decided to go with a Rebel X Sports handlebar rally instruments billet bracket. One could also attach everything to the handlebars but having important instruments in your sight helps with focusing on the trails. In the past, I often mounted GPS/Phone etc. directly to the bars and wanted to improve on it this time. As I don't need a roadbook, I also don’t need rally instrument brackets or tower. There are lots of mounting options out there, I’ll try this one for the time being.
The stock 450 EXC does not come with a Ignition Switch, so for security reasons or at least peace of mind, I added one, mounted directly to the bracket. Same way mounted on the other side is a USB 12v socket. Both are mounted with VA hose clamps, which might be appearing a bit "gehtto" but so far I’m really digging this simple and space-saving solution.
I really like wrapping things in mountainbike inner tubes for protecting parts and dampening effects. So beside the bracket itself, bar risers, throttle cables also ignition switch and USB socket are wrapped in those light tubes.
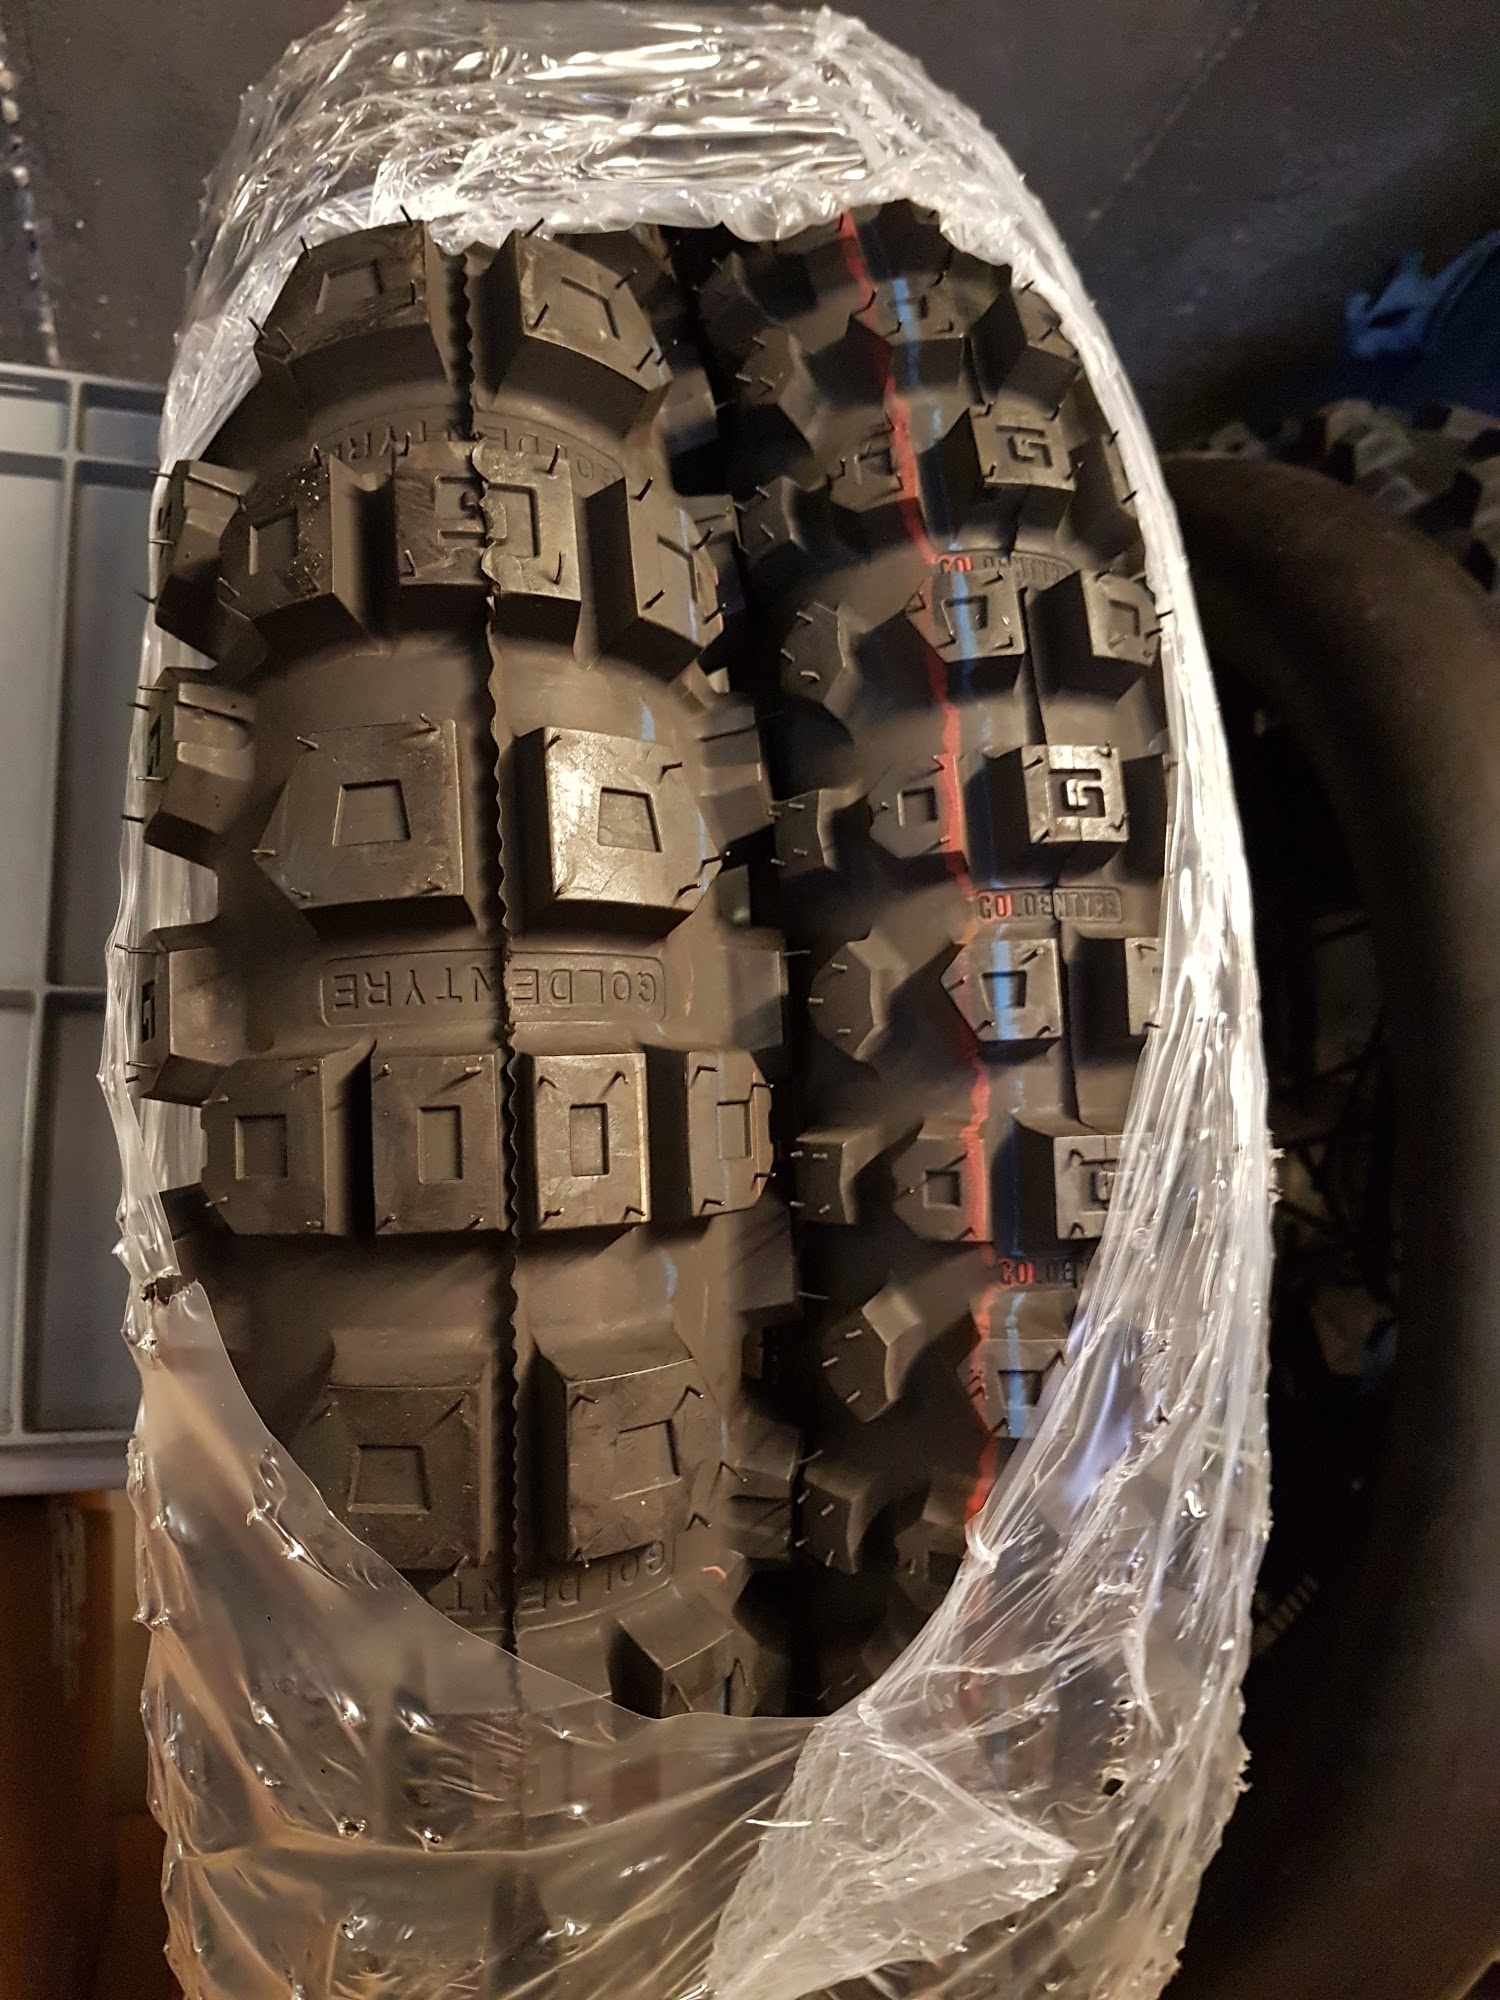
Tires
This time I went with a set of Goldentyres GT 723 R. The reason for this are very good reviews and when I saw the front tire mounted on a friends bike I was instantly hooked. They should last quite a while as Mr. Poskitt got around 10k out of them and work reasonably well also on pavement. Big plus for field repairs is the tire lever friendliness. The carcass of front and rear tire is way less stiff than other players built them. For example Mitas E09 Dakar version or even the stock Metzeler Six Days are way stiffer. I prefer having a easily mountable tire equipped instead of having a ultra stiff one that might also be ridden even with puncture, without any air pressure. I run heavy duty tubes inside, just for the notice.